Mitigating DNA Extraction Kit Batch Effects: A Comprehensive Guide for Robust Genomic Research
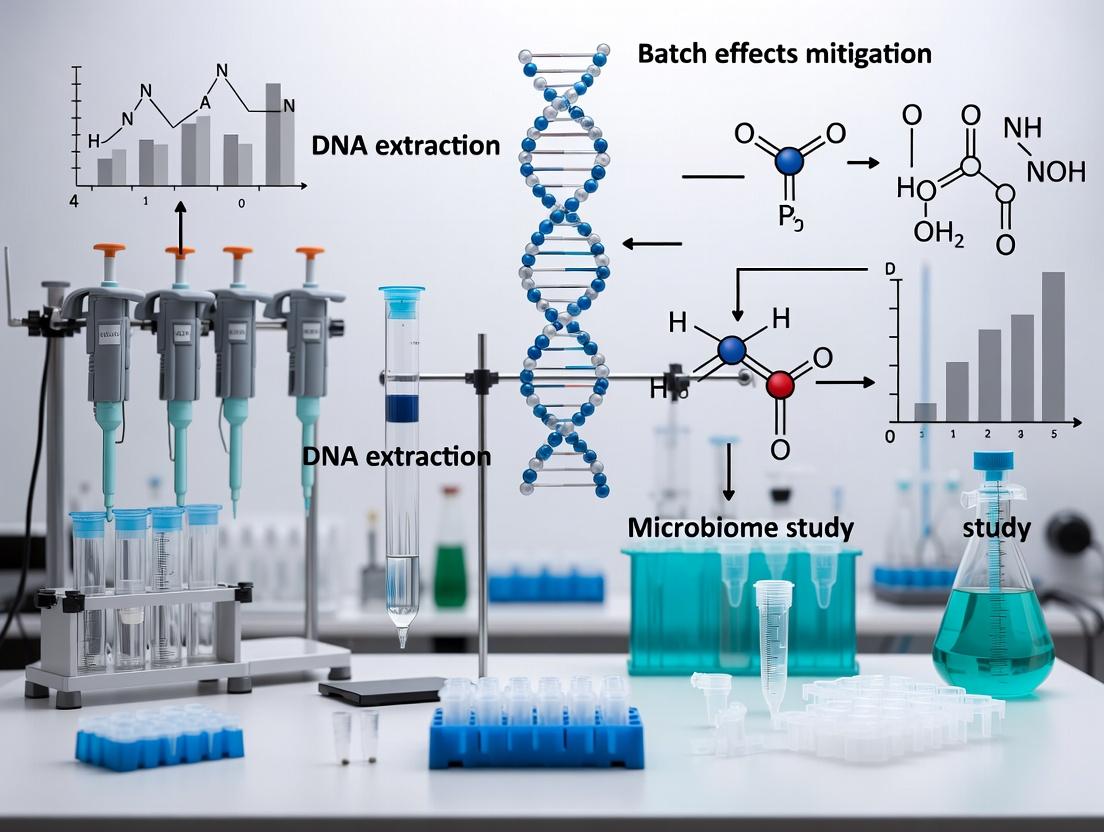
This article provides a systematic framework for researchers, scientists, and drug development professionals to identify, understand, and mitigate batch effects introduced by commercial DNA extraction kits.
Mitigating DNA Extraction Kit Batch Effects: A Comprehensive Guide for Robust Genomic Research
Abstract
This article provides a systematic framework for researchers, scientists, and drug development professionals to identify, understand, and mitigate batch effects introduced by commercial DNA extraction kits. Covering foundational principles, practical mitigation methodologies, troubleshooting strategies, and validation protocols, it addresses the critical need for reproducibility in genomics. By implementing the outlined best practices, professionals can enhance data integrity, ensure reliable downstream analyses, and improve the translatability of findings in biomedical and clinical research.
Understanding the Source: What Are DNA Extraction Kit Batch Effects and Why Do They Matter?
Defining Batch Effects in the Context of Nucleic Acid Extraction
Within the scope of DNA extraction kit batch effects mitigation research, a "batch effect" refers to non-biological variations in experimental results that are directly attributable to technical differences between batches of nucleic acid extraction kits or reagents. These variations can confound data analysis, leading to inaccurate conclusions in downstream applications like next-generation sequencing (NGS), qPCR, and microarray analysis. This technical support center provides troubleshooting and FAQs to identify, diagnose, and mitigate these critical issues.
FAQs & Troubleshooting Guides
Q1: My qPCR results show significantly different yield or purity (A260/A280) between two experiments using the same tissue type, but different kit boxes. Is this a batch effect? A: This is a primary symptom. First, check the lot numbers on the kit boxes. If different, perform a controlled experiment: split a single, homogeneous sample and extract using reagents from both kit boxes in parallel. Compare yields and purity metrics. A systematic difference indicates a batch effect. Verify your instrument calibration and ensure the same operator performs both extractions to rule out operator variability.
Q2: After switching to a new kit lot, my NGS data shows a global shift in gene expression profiles. How do I confirm it's a batch effect and not biological? A: To confirm, re-process a subset of previous samples (if available) using the new kit lot alongside new samples with the new lot. Use Principal Component Analysis (PCA). If the primary principal component (PC1) separates samples purely by extraction lot rather than biological group, a batch effect is likely present. Statistical tests like a PERMANOVA on the sample distances can quantify the variance explained by the batch.
Q3: I suspect the silica membrane in my spin column kit has changed. What tests can I run? A: Perform a binding efficiency test. Create a standardized nucleic acid solution (e.g., lambda DNA at a known concentration). Follow the standard protocol from both suspected lots, but elute in separate, pre-defined volumes. Measure the recovered concentration via fluorometry (e.g., Qubit). Calculate and compare the percentage recovery.
| Test Metric | Kit Lot A | Kit Lot B | Acceptable Range |
|---|---|---|---|
| Input DNA (ng) | 1000 | 1000 | N/A |
| Elution Volume (µL) | 50 | 50 | N/A |
| Recovered DNA (ng) | 850 | 720 | N/A |
| % Recovery | 85% | 72% | >80% ± 5% |
| A260/A280 | 1.92 | 1.95 | 1.8 - 2.0 |
Q4: What are the most common reagent-related sources of batch effects in extraction kits? A: The table below summarizes key components and their potential failure modes.
| Reagent/Component | Potential Batch Variation | Impact on Extraction |
|---|---|---|
| Lysis Buffer | Concentration of chaotropic salts, detergents, or pH. | Incomplete lysis, co-precipitation of inhibitors, protein contamination. |
| Binding Buffer | Alcohol concentration, pH, or salt impurities. | Reduced binding efficiency to silica membrane, carryover of inhibitors. |
| Wash Buffer | Ethanol concentration, buffer salt composition, pH. | Incomplete removal of salts/inhibitors, or over-drying of membrane. |
| Elution Buffer | pH, presence of EDTA, or RNase/DNase contamination. | Low yield, degraded nucleic acid, inhibition of downstream assays. |
| Silica Membrane | Pore size, thickness, or manufacturing consistency. | Altered binding capacity, elution efficiency, or contaminant retention. |
| Magnetic Beads | Size distribution, coating density, aggregation. | Inconsistent binding-wash-elution, leading to variable yield and purity. |
Experimental Protocols for Batch Effect Investigation
Protocol 1: Controlled Cross-Lot Comparison
Objective: To isolate and quantify performance differences between two kit lots.
- Sample Preparation: Aliquot a single, large-volume, homogeneous biological sample (e.g., cell pellet slurry or tissue homogenate) into 12 identical tubes.
- Extraction: Randomize the tubes. Process 6 aliquots using reagents from Kit Lot A and 6 using Kit Lot B. Perform extractions in an interleaved order to control for time effects.
- Quantification & QC: Elute in identical volumes. Quantify yield using a fluorometric assay (Qubit) for accuracy. Assess purity via spectrophotometry (A260/A280, A260/A230). Run a standardized downstream assay (e.g., qPCR for a housekeeping gene) to assess inhibitor presence.
- Statistical Analysis: Perform a t-test on the yields and Cq values between the two groups. A p-value < 0.05 indicates a statistically significant batch effect.
Protocol 2: SPIKE-In Experiment for Inhibitor Detection
Objective: To identify if a new kit lot introduces inhibitors co-purified with nucleic acids.
- Spike Solution: Prepare a solution of purified nucleic acid (e.g., salmon sperm DNA) at a known concentration.
- Extraction: Add identical volumes of the spike solution to lysis buffer from Lot A and Lot B. Carry the spiked material through the entire extraction protocol of each kit.
- Analysis: Elute and quantify the recovered DNA. Compare the percentage recovery between lots. A significant drop in recovery for one lot suggests stronger binding of inhibitors or degradation of the nucleic acid itself during the process.
The Scientist's Toolkit: Key Reagent Solutions
| Item | Function in Batch Effect Research |
|---|---|
| Standard Reference Material (e.g., NA12878 gDNA) | Provides a homogeneous, biologically stable nucleic acid source for inter-lot and inter-lab comparisons. |
| Fluorometric Quantitation Kit (Qubit/PicoGreen) | Provides accurate, specific quantification of dsDNA or RNA, unaffected by common contaminants. |
| Digital PCR (dPCR) System | Enables absolute quantification of target sequences without a standard curve, critical for detecting inhibition. |
| Synthetic Spike-In Controls (e.g., ERCC RNA spikes) | Added to lysates before extraction to monitor recovery and efficiency through the entire process. |
| Next-Generation Sequencing (NGS) Platform | Enables genome-wide assessment of batch effects via PCA and other multivariate analyses. |
Visualizations
Diagram Title: Workflow for Identifying Nucleic Acid Extraction Batch Effects
Diagram Title: Common Sources of Extraction Kit Batch Variability
Troubleshooting Guides & FAQs
FAQ 1: Why is my DNA yield significantly lower after switching to a new kit lot number?
- Answer: This is a common symptom of reagent lot variability, particularly in lysis/binding buffers. The concentration of chaotropic salts (e.g., guanidine hydrochloride) or the pH can vary between lots, altering binding efficiency to the silica membrane. To troubleshoot: 1) Centrifuge lysates at higher speed to prevent column clogging. 2) Ensure ethanol used in wash buffers is fresh and of the correct concentration. 3) Perform a parallel extraction using the old and new lots on the same sample to quantify the difference. See Table 1 for mitigation protocols.
FAQ 2: My extracted DNA has poor purity (low 260/230 ratio) after a protocol revision that changed wash buffer volumes.
- Answer: Reduced wash volumes may leave residual salts or ethanol from the wash buffer. This directly impacts downstream applications like PCR. Ensure the elution buffer is warmed to 55-60°C and that you allow a 2-minute incubation on the membrane before centrifugation. Perform an extra "dry spin" step (1 minute with an empty collection tube) after the final wash to evaporate residual ethanol.
FAQ 3: How can I determine if failed NGS library prep is due to DNA extraction variability or library preparation reagents?
- Answer: Implement a systematic QC checkpoint. Run extracted DNA on a capillary electrophoresis system (e.g., Fragment Analyzer, Bioanalyzer) to assess integrity and confirm concentration. Use a standardized control DNA (e.g., Lambda DNA) in your library prep to isolate the variable. If the control libraries perform well, the issue likely originates from the extracted DNA's purity or integrity, pointing to extraction batch effects.
FAQ 4: What is the most effective way to document silica membrane performance between suppliers?
- Answer: Design a controlled experiment measuring binding capacity, elution efficiency, and shearing. Use a single, homogeneous sample (e.g., cultured cells) and a single lot of all other reagents. Extract using identical protocols but swap only the column/silica membrane. Measure yield (Qubit), purity (Nanodrop 260/280, 260/230), and integrity (gel electrophoresis). Record flow-through rates and any clogging incidents. See Table 2 for a comparative framework.
Experimental Protocols for Batch Effect Mitigation Research
Protocol 1: Cross-Lot Testing of Binding Buffers
- Objective: Quantify yield and purity variability attributable to lysis/binding buffer lots.
- Methodology:
- Select one control lot (A) and two test lots (B, C) of the binding buffer from the same kit.
- Use a standardized sample (e.g., 1x10^6 HEK293 cells per replicate, n=5).
- Keep all other components (silica membrane, wash buffers, elution buffer, protocol) constant.
- Extract DNA following the manufacturer's protocol.
- Quantify yield using a fluorescence-based assay (e.g., Qubit dsDNA HS Assay) and purity via spectrophotometry (260/280, 260/230 ratios).
- Perform one-way ANOVA to determine statistical significance of yield differences between lots.
Protocol 2: Silica Membrane Binding Capacity Assessment
- Objective: Determine the maximum input material a specific membrane lot can handle without clogging or losing yield.
- Methodology:
- Prepare a homogenized tissue lysate (e.g., mouse liver).
- Create a dilution series representing 50%, 100%, 150%, and 200% of the manufacturer's recommended maximum input.
- Using a single lot of all reagents, process the series through identical columns.
- Record the time for lysate to pass through the membrane during each load step.
- Proceed with standard washes and elution.
- Measure yield and plot against input amount. Deviation from linearity indicates exceeding binding capacity.
Protocol 3: Validating a Protocol Revision for Wash Steps
- Objective: Ensure a revised wash protocol (e.g., reduced volume or incubation time) does not compromise purity.
- Methodology:
- Control: Execute the original, validated protocol.
- Test: Execute the revised protocol.
- Use a challenging, high-salt sample (e.g., formalin-fixed tissue).
- Elute in a low-ionic-strength buffer (e.g., 10 mM Tris-HCl, pH 8.5).
- Measure purity via spectrophotometry (260/230 ratio is critical for salt carryover).
- Perform a downstream stress test: use 1 ng of extracted DNA in a 40-cycle qPCR assay with intercalating dye. Compare Cq values and amplification curves between control and test DNA. A significant delta Cq (>1) suggests inhibitor carryover from the revised wash.
Data Summaries
Table 1: Mitigation Strategies for Primary Variability Sources
| Variability Source | Symptom | Recommended Mitigation Action | Verification Experiment |
|---|---|---|---|
| Reagent Lot | Inconsistent yield or purity between batches. | Implement incoming QC: test new lots alongside a "gold standard" lot using a control sample. | Protocol 1 (Cross-Lot Testing). |
| Silica Membrane | Clogging, variable flow rates, DNA shearing. | Benchmark membranes from different suppliers for binding capacity and elution efficiency. | Protocol 2 (Binding Capacity Assessment). |
| Protocol Revision | Altered DNA integrity or inhibitor carryover. | Perform a full validation (yield, purity, integrity, downstream functionality) vs. the old protocol. | Protocol 3 (Wash Step Validation). |
Table 2: Silica Membrane Supplier Comparison
| Parameter | Supplier X Membrane | Supplier Y Membrane | Measurement Method |
|---|---|---|---|
| Average Yield (ng) | 2450 ± 120 | 2310 ± 95 | Qubit dsDNA HS Assay |
| 260/280 Purity | 1.82 ± 0.03 | 1.80 ± 0.05 | Spectrophotometry |
| 260/230 Purity | 2.15 ± 0.10 | 1.95 ± 0.15* | Spectrophotometry |
| Binding Capacity | High (200mg tissue) | Medium (150mg tissue) | Protocol 2 Linearity |
| Flow Rate | Consistent | Occasionally Slow | Visual Timing |
*Lower 260/230 suggests higher residual guanidine/acetate.
Visualizations
DNA Extraction Batch Effect Investigation Workflow
Silica-Based DNA Binding Chemistry
The Scientist's Toolkit: Key Research Reagent Solutions
| Item | Function in Batch Effect Research |
|---|---|
| Fluorometric DNA Quantitation Kit (e.g., Qubit) | Provides accurate, dye-based DNA concentration measurement unaffected by common contaminants, critical for comparing yields between lots. |
| Capillary Electrophoresis System (e.g., Fragment Analyzer, Bioanalyzer) | Assesses DNA integrity (DV200, RINe) and size distribution, identifying shearing or degradation caused by membrane or protocol changes. |
| Synthetic DNA/RNA Spike-in Controls | Inert, quantified external standards added to samples pre-extraction to monitor and normalize for recovery efficiency across batches. |
| Homogenized Reference Sample (e.g., Cell Pellet, Tissue Powder) | A large, homogeneous biological material aliquoted for use as a control sample in every experiment to isolate technical from biological variance. |
| Intercalating Dye qPCR Master Mix | A sensitive downstream assay to detect PCR inhibitors carried over from extraction, indicating wash buffer or protocol inefficacy. |
| Standardized Elution Buffer (10mM Tris-HCl, pH 8.5) | A low-ionic-strength, pH-stable buffer for final DNA elution, minimizing variable effects from kit-provided elution buffers. |
Troubleshooting Guide & FAQs
Q1: We observed significantly lower DNA yield and degraded fragments after extraction, leading to failed library prep for NGS. Could this be a batch effect from the extraction kit? A: Yes. Inconsistent lysis buffer potency or silica membrane binding capacity between kit batches can cause variable yield and fragment size. This directly impacts NGS library concentration and insert size distribution.
- Troubleshooting Protocol:
- Quantify & Quality Check: Run DNA from the suspected and a known-good batch on a fluorometer (e.g., Qubit) and a fragment analyzer (e.g., Bioanalyzer/TapeStation). Compare yields and DV200 values.
- Spike-in Control Test: Repeat extraction using a synthetic exogenous DNA spike-in control (e.g., from External RNA Controls Consortium - ERCC) added to the lysis buffer. qPCR quantification of the spike-in post-extraction can isolate batch-specific inefficiencies.
- Protocol Adjustment: If degradation is suspected, reduce incubation times in the lysis buffer if it is harsh, or ensure temperature is precisely controlled.
Q2: Our qPCR results show high Ct value variability and poor amplification efficiency between experimental runs, despite using the same sample source. Is the extraction kit a factor? A: Absolutely. Batch-to-batch differences in inhibitor removal efficiency (e.g., salts, phenols, alcohols) are a primary cause. Residual inhibitors from the extraction kit carryover can severely affect polymerase activity in qPCR.
- Troubleshooting Protocol:
- Inhibitor Detection Assay: Perform a dilution series qPCR assay. If amplification efficiency is poor and does not improve with sample dilution, inhibitors are likely present.
- Post-Extraction Purification: Clean up the DNA from both batches using a validated post-extraction cleanup kit (e.g., silica column or SPRI beads). Re-run qPCR. If Ct values normalize, it confirms inhibitor carryover from the original extraction batch.
- Alternative Quantification: Compare absorbance ratios (A260/A230, A260/A280) from Nanodrop. A low A260/A230 (<1.8) suggests chemical/salt carryover.
Q3: Microarray data shows increased background noise and inconsistent hybridization signals. Could DNA extraction batch variability contribute to this? A: Yes. Microarrays are sensitive to DNA purity and integrity. Batch effects in extraction can lead to variable co-precipitation of contaminants that interfere with fluorescent labeling or hybridization.
- Troubleshooting Protocol:
- Labeling Efficiency Check: Compare the specific activity (fluorescence units per ng DNA) of your labeled targets from different extraction batches. Lower specific activity indicates labeling issues often due to purity.
- Pre-Hybridization QC: Run the fragmented and labeled DNA on an agarose gel or bioanalyzer. Smearing or atypical size distributions point to integrity issues from extraction.
- Inter-Batch Hybridization: Hybridize samples from different extraction batches onto the same microarray slide to control for slide-to-slide variation and isolate the extraction variable.
Q4: How can we systematically test and mitigate DNA extraction kit batch effects before launching a large study? A: Implement a standardized QC validation pipeline for every new kit lot.
- Experimental Validation Protocol:
- Sample: Use a homogeneous, well-characterized reference DNA source (e.g., commercial human control DNA, or a large batch of pre-pooled cell lysate). Aliquot and store at -80°C.
- Parallel Extraction: Extract DNA from 6-8 replicates of the reference material using the old (validated) kit batch and the new (incoming) batch in parallel.
- Downstream Assay: Subject all eluates to your core downstream assays: a) qPCR for 3-5 single-copy genes, b) Fluorometric quantification, c) Fragment analysis, and d) A pilot NGS run or microarray hybridization if resources allow.
- Statistical Analysis: Perform t-tests or ANOVA on yields, Ct values, and DV200 metrics. For NGS/microarray pilot data, use Principal Component Analysis (PCA) to see if batch clusters separately from biological variation.
Table 1: Impact of Extraction Kit Batch Effects on Downstream Applications
| Downstream Application | Primary Impact of Batch Variation | Key QC Metrics Affected | Typical Data Outcome of a Bad Batch |
|---|---|---|---|
| qPCR / dPCR | Inhibitor carryover, variable yield | Ct values, Amplification Efficiency, Inter-run Reproducibility | High Ct, low efficiency, non-linear dilution series |
| Next-Generation Sequencing | Fragmentation integrity, inhibitor presence | Library Prep Success Rate, Insert Size Distribution, Duplication Rates, Coverage Uniformity | Failed library prep, short fragments, high duplication, uneven coverage |
| Microarrays | Labeling efficiency, non-specific binding | Signal-to-Noise Ratio, Background Fluorescence, Present Calls | High background, low specific signal, increased false negatives |
Table 2: Recommended QC Thresholds for Batch Acceptance
| QC Assay | Target Metric | Acceptable Range for Batch Concordance |
|---|---|---|
| Fluorometric Quant (Qubit) | DNA Yield from Reference Sample | Within ±15% of established batch mean |
| Fragment Analyzer | DV200 Value | Within ±10% of established batch mean |
| qPCR | Ct Value for Single-Copy Gene | No statistically significant difference (p>0.05) |
| Absorbance (Nanodrop) | A260/A280 Ratio | 1.8 - 2.0 |
| A260/A230 Ratio | >1.8 |
Experimental Protocols
Protocol 1: Exogenous Spike-in Control for Extraction Efficiency Purpose: To decouple technical batch variance from biological variance.
- Spike-in Addition: Add a known quantity of non-human (e.g., Arabidopsis thaliana) synthetic DNA sequence (e.g., 1000 copies/µL) to the lysis buffer at the very start of extraction.
- Co-extraction: Proceed with the standard extraction protocol. The spike-in is subjected to the same batch-specific conditions.
- Quantification: Quantify the recovered spike-in DNA using a TaqMan qPCR assay specific to its sequence.
- Analysis: Normalize the endogenous human DNA yield (by qPCR for a housekeeping gene) to the recovery efficiency of the spike-in. Low spike-in recovery in a specific batch indicates a batch effect.
Protocol 2: Inter-Batch Cross-Validation for NGS Purpose: To attribute variability to the extraction batch prior to full-scale sequencing.
- Design: Extract DNA from N=4 diverse but homogeneous samples using Batch A and Batch B.
- Library Prep: Process all 8 DNA samples (4 samples x 2 batches) in a single, randomized library preparation run to eliminate library prep batch effects.
- Sequencing: Pool and sequence all libraries on the same flow cell lane.
- Bioinformatic QC: Calculate standard NGS metrics (mapped reads, duplication rate, coverage). Perform PCA on variant calls or gene expression counts. Clustering by extraction batch indicates a significant batch effect.
Visualizations
Title: DNA Extraction Batch Effect Detection Workflow
Title: How Inhibitor Carryover Impacts Downstream Assays
The Scientist's Toolkit: Research Reagent Solutions
Table 3: Essential Materials for Batch Effect Mitigation Research
| Item | Function in Batch Testing |
|---|---|
| Homogenized Reference Standard (e.g., commercial gDNA, pooled cell pellet) | Provides a consistent biological input to isolate technical variance from extraction kits. |
| Exogenous DNA Spike-in Controls (e.g., ERCC, A. thaliana sequences) | Added at lysis, these controls measure extraction efficiency independently of sample biology. |
| Fluorometric DNA Quantification Kit (e.g., Qubit dsDNA HS/BR Assay) | More accurate than absorbance for low-concentration or impure samples post-extraction. |
| Fragment Analyzer / Bioanalyzer & Associated Reagents (e.g., HS NGS Fragment kit) | Provides critical DNA Integrity Number (DIN) or DV200 metrics for NGS suitability. |
| Inhibitor-Detection qPCR Assay | A dilution series assay using a known DNA template to detect polymerase inhibition. |
| Post-Extraction Cleanup Kit (e.g., SPRI beads, silica columns) | Used diagnostically to test if purification of an extract improves downstream results. |
| Multicopy & Single-Copy Gene qPCR Primers | For assessing yield and potential sequence-specific biases from extraction. |
This technical support center provides troubleshooting guidance for researchers investigating batch effects in DNA extraction kits, framed within a thesis on batch effect mitigation. The following FAQs and guides address real-world experimental challenges documented in recent literature.
Troubleshooting Guides & FAQs
Q1: My qPCR results show significant variation between plates run on different days, despite using the same sample source and kit. What could be the cause? A: This is a classic symptom of a batch or "plate" effect. Published case studies (e.g., in BMC Genomics, 2022) show that reagent lot variation in master mixes or differences in plasticware (e.g., plate seals) can alter amplification efficiency.
- Actionable Protocol:
- Re-analyze: For each plate, include an identical "reference" control sample in triplicate.
- Statistical Check: Perform a Principal Component Analysis (PCA) colored by "Plate Batch." If samples cluster by plate, a batch effect is confirmed.
- Mitigation: Use a normalization method like
ComBatorremoveBatchEffect(limma package in R) if the effect is validated and documented. The preferred solution is to re-run all samples with a single, validated reagent lot.
Q2: My microbiome sequencing data shows community structure differences that correlate with the extraction kit lot number. How do I diagnose and resolve this? A: Multiple studies have identified DNA extraction kit lot as a major technical confounder in microbial profiling. Differences in lysis buffer composition or bead lot can bias recovery of specific taxa (e.g., Gram-positive bacteria).
- Actionable Protocol:
- Experimental Design: Always process samples from different experimental groups across multiple kit lots. Randomize and block your design.
- Inclusion of Controls: Use a mock microbial community standard (e.g., from ZymoBIOMICS) with each extraction batch.
- Analysis: Calculate alpha and beta diversity metrics. Use PERMANOVA to test the significance of the "Kit Lot" variable versus your experimental variable. If the kit lot is significant, it must be included as a covariate in downstream models.
Q3: How can I prove that an observed batch effect is statistically significant and not random noise? A: You must formally test the association between the batch variable and your outcome data.
- Actionable Protocol:
- For high-dimensional data (genomics), use PCA or MDS visualization colored by batch.
- Apply a statistical test: for continuous data, use a linear model; for microbiome data, use PERMANOVA on the distance matrix.
- The null hypothesis is that variance explained by batch is not significant. A p-value < 0.05 rejects this, confirming a batch effect.
Q4: I've identified a batch effect. Can I just computationally correct it, or must I repeat the experiment? A: Computational correction (e.g., using sva, limma, or ComBat) is a common but cautious approach. The decision tree is as follows:
The High Cost of Ignoring Batch Variability in Multi-Center and Longitudinal Studies
Technical Support Center: Mitigating DNA Extraction Kit Batch Effects
FAQs & Troubleshooting Guides
Q1: Our multi-center study shows significant batch clustering in PCA plots, correlating with different DNA extraction kit lot numbers. How can we confirm this is a batch effect and not biological? A: Perform the following diagnostic experiment:
- Protocol: Re-extract a subset of identical biological reference samples (e.g., a commercial pooled human control) using the old kit lot and the new kit lot in parallel. Use the same downstream quantification (e.g., Qubit), quality assessment (e.g., Bioanalyzer), and analysis platform (e.g., microarray or sequencing).
- Data Analysis: Compare the results in a structured table. Biological signals should be consistent, while technical batch effects will manifest as systematic differences.
Table 1: Diagnostic Experiment Results for Suspected Batch Effect
| Metric | Old Kit Lot (n=5 replicates) | New Kit Lot (n=5 replicates) | Expected Result (No Batch Effect) | Observed Result (With Batch Effect) |
|---|---|---|---|---|
| Mean DNA Yield (ng/µL ± SD) | 45.2 ± 2.1 | 52.8 ± 1.9 | No significant difference (p > 0.05) | Significant difference (p < 0.01) |
| Mean 260/280 Ratio (± SD) | 1.82 ± 0.03 | 1.78 ± 0.05 | ~1.8, no significant difference | Significant shift (p < 0.05) |
| Fragment Size (DV200 %) | 85% ± 3% | 78% ± 4% | >80%, no significant difference | Significant drop (p < 0.05) |
| PCA Cluster | Groups with Old Lot samples | Groups with New Lot samples | Mixed clustering by sample type | Clear separation by extraction lot |
Q2: We've identified a batch effect. What wet-lab steps can we take to minimize its impact before computational correction? A: Proactive experimental design is critical.
- Protocol for Longitudinal Studies: For studies where samples are collected over time, do not align kit lot changes with timepoints or intervention groups. Pre-purchase all kits from a single validated lot if possible. If not, create a lot bridging design:
- During the switch from Lot A to Lot B, select a representative subset of 10-20% of samples from the previous timepoint.
- Re-extract these samples using Lot B in parallel with new samples.
- These "bridge samples" allow direct measurement of the lot effect for downstream statistical modeling.
Q3: Which computational batch-effect correction methods are most suitable for DNA extraction kit variability in genomic data? A: The choice depends on your experimental design and data type.
Table 2: Comparison of Batch-Effect Correction Methods
| Method | Best For | Key Requirement | Limitation |
|---|---|---|---|
| ComBat (Empirical Bayes) | Microarray or sequencing data with known batch labels. | Multiple samples per batch. | May over-correct if batch is confounded with weak biological signal. |
| Limma (removeBatchEffect) | Gene expression matrices. | Linear model design. | Requires careful model specification to avoid removing biology. |
| Harmony (Integration) | Single-cell or high-dimensional data. | Dimensional reduction input (e.g., PCA). | Excellent for clustering but can obscure source of variation for diagnostics. |
| SVA (Surrogate Variable Analysis) | Studies where batch is unknown or high-dimensional. | No prior batch info needed; infers latent factors. | Computationally intensive; interpretation of factors can be challenging. |
Q4: How do we validate that our batch correction was successful without removing true biological signal? A: Implement a two-pronged validation protocol.
- Technical Validation: Use the bridge samples from Q2. After correction, these technically different replicates should cluster together in a PCA plot.
- Biological Validation: Check known positive and negative controls. For example, in a case-control study, known differentially expressed genes related to the disease should remain significant post-correction, while genes previously correlated only with batch should lose significance.
Experimental Workflow Diagram
Title: Batch Effect Mitigation Workflow for DNA Studies
Signaling Pathway of Batch Effect Impact
Title: How Kit Batch Variability Introduces Technical Bias
The Scientist's Toolkit: Key Research Reagent Solutions
Table 3: Essential Materials for Batch Effect Mitigation Experiments
| Item | Function & Role in Mitigation |
|---|---|
| Commercial Reference Standard | (e.g., Coriell Institute DNA, pooled human serum). Provides a biologically constant sample to track technical variation across kits/lots. |
| Internal Control Spike-ins | (e.g., ERCC RNA Spike-in, synthetic alien DNA). Added pre-extraction to monitor and normalize for recovery efficiency differences. |
| Dual-Lot Kit Bridging Set | Purchasing kits from both old and new lots simultaneously to perform the critical diagnostic bridging experiment. |
| Automated Nucleic Acid Extractor | Reduces manual protocol variation, isolating the variable of interest to the kit chemistry itself. |
| Digital QC Platform | (e.g., Fragment Analyzer, Bioanalyzer, Qubit). Provides quantitative, objective metrics (Table 1) for lot-to-lot comparison beyond just yield. |
Proactive Mitigation: Best Practices for Experimental Design and Kit Handling
Troubleshooting Guides & FAQs
Q1: Our downstream PCR or sequencing results show clear clustering by DNA extraction kit batch, not by biological group. What is the first step in diagnosing this issue? A1: The first step is to perform a Principal Component Analysis (PCA) or similar multivariate analysis on your control samples or a standardized reference material run across all batches. This confirms if the observed variation is technical (batch) versus biological. Inspect the first principal component; if it correlates strongly with batch ID, a batch effect is confirmed. Immediately audit your sample allocation table to see if biological groups were unintentionally confounded with batches.
Q2: How do we properly implement blocking in our experimental design when we know our sample processing must span multiple kit lots or preparation days? A2: Treat each batch (kit lot/operator/day) as a block. The key principle is that each block should contain a mini-experiment representing all biological conditions of interest. For example, if studying Healthy vs. Diseased groups, each batch must process an equal (or proportionally balanced) number of samples from both groups. This allows statistical models to separate variation due to 'Block' (batch) from variation due to 'Group' during analysis.
Q3: What is a specific protocol for assessing DNA extraction kit batch effects using a reference standard? A3:
- Materials: Commercially available reference genomic DNA (e.g., from NAHEM or ATCC) or a well-characterized, homogeneous internal pool sample.
- Protocol:
- Reconstitution & Aliquoting: Reconstitute the reference standard in a large, master batch of low TE buffer. Create single-use aliquots to avoid freeze-thaw cycles.
- Integration: Include one aliquot of this reference standard in every DNA extraction batch you run. Position it randomly within the sample sequence for that batch.
- Downstream Analysis: Process all extracted reference samples through your downstream assay (e.g., qPCR for a target gene, whole genome sequencing, or microarray).
- Data Analysis: Measure your key output (e.g., yield, purity, fragment size, sequencing metrics, or variant calls) for the reference samples. Statistically compare these metrics across batches using ANOVA or a batch-effect specific metric like the Percent Variance Explained (PVE) by batch.
Q4: We cannot process all samples in one batch due to capacity. How do we randomize samples when we have multiple biological groups? A4: Do not randomize all samples from all groups in one large pool. Instead, use Stratified Randomization: 1. List all your samples by biological group (Strata). 2. For each group separately, randomly assign the samples within that group to the available batches. 3. Ensure the final allocation maintains approximate balance of group sizes across batches. This prevents chance over-representation of one group in a problematic batch.
Q5: What are the key reagent solutions for a batch-effect mitigation study in DNA extraction? A5:
| Research Reagent Solution | Function in Batch Effect Mitigation |
|---|---|
| Certified Reference Genomic DNA | Serves as an inter-batch calibrator; allows quantification of technical variability independent of biological source. |
| Internal Control Spike-in (e.g., Synthetic Oligo or Alien DNA) | Added uniformly to each lysate pre-extraction to monitor and normalize for recovery efficiency across batches. |
| Dual-Indexed Sequencing Adapters (Unique Combinations) | Enables multiplexing of samples from multiple batches into a single sequencing run, decoupling library prep batch from sequencing batch. |
| Commercial Inhibitor Removal Beads/Columns | Standardizes the removal of contaminants that can vary by sample type and affect downstream assay consistency batch-to-batch. |
| Automated Nucleic Acid Extraction System & Reagent Cartridges | Reduces operator-induced variability and ensures consistent reagent volumes and incubation times across batches. |
Table 1: Example Metrics from a Batch Effect Assessment Study Using a Reference Standard
| Batch ID (Kit Lot) | Samples Processed (n) | Mean DNA Yield from Reference Std (ng/µl ± SD) | Mean A260/A280 ± SD | PVE by Batch in PCA (%) |
|---|---|---|---|---|
| Lot A | 96 | 45.2 ± 3.1 | 1.82 ± 0.03 | 65% |
| Lot B | 96 | 51.8 ± 2.8 | 1.87 ± 0.04 | |
| Lot C | 96 | 44.9 ± 4.5 | 1.79 ± 0.07 |
Table 2: Impact of Sample Balancing Across Batches on Statistical Power
| Allocation Scenario | Group Confounding? | Detectable Fold-Change (Power=0.8) | False Positive Rate for Batch-Associated Biomarkers |
|---|---|---|---|
| Unbalanced (All Group 1 in Batch A) | Severe | >2.5x | >30% |
| Balanced (Equal Group 1 & 2 in all Batches) | None | 1.8x | ~5% (Nominal) |
Experimental Protocol: Coordinated Cross-Batch Extraction for Differential Expression Analysis
Title: Protocol for a Balanced, Blocked DNA Extraction Study.
Methodology:
- Experimental Design Phase:
- Define batches: e.g., 3 kit lots, 2 extraction days per lot = 6 total batches.
- List all biological samples (e.g., 12 Control, 12 Treated).
- Using stratified randomization software, assign 2 Control and 2 Treated samples to each of the 6 batches. This is the Sample Allocation Map.
Wet-Lab Phase:
- Per batch, process the 4 assigned biological samples plus 1 aliquot of the universal reference standard.
- Include a blank (no-sample) control in each batch.
- Use a single, calibrated instrument and a single operator for all quantitation steps post-extraction.
Analysis Phase:
- Quantify batch effect using reference standard metrics (Table 1).
- Perform differential analysis using a model that includes 'Batch' as a random or fixed effect (e.g.,
~ Batch + Groupin DESeq2/limma).
Visualizations
Title: Workflow for Strategic Experimental Design Across Batches.
Title: Balanced Sample Allocation Across Three Batches.
Technical Support Center: Troubleshooting DNA Extraction Kit Batch Effects
Troubleshooting Guides & FAQs
Q1: After switching to a new lot of my DNA extraction kit, my qPCR yields show significant variance in Ct values. What could be the cause and how can I confirm it?
A: This is a classic symptom of a kit batch effect. The likely cause is variability in the concentration or activity of a critical reagent, such as Proteinase K or the silica-binding matrix, between manufacturing lots. To confirm:
- Run a Parallel Extraction: Process identical, aliquoted sample sets with the old (control) lot and the new (test) lot simultaneously.
- Use a Standardized Control: Include a commercially available reference DNA sample or a well-characterized in-house control in both extraction batches.
- Quantify Output: Measure DNA yield and purity (A260/A280) spectrophotometrically and compare performance via qPCR amplification efficiency.
- Statistical Analysis: Perform a t-test or ANOVA on the resulting Ct values or yields. A p-value <0.05 between lots indicates a statistically significant batch effect.
Q2: My laboratory management system flagged a potential issue with a kit lot. What is the recommended experimental protocol to validate a new DNA extraction kit lot before full deployment?
A: Implement a formal Lot Qualification Protocol.
Experimental Protocol: DNA Extraction Kit Lot Qualification
- Objective: To ensure a new kit lot performs equivalently to a qualified reference lot.
- Materials: New kit lot, qualified reference kit lot, standardized control sample (e.g., cultured cells, tissue homogenate), identical sample aliquots, standard laboratory equipment.
- Method:
- Sample Preparation: Create 20 identical, homogeneous aliquots of your control sample.
- Blinded Extraction: Assign 10 aliquots to be processed with the reference lot and 10 with the new lot. Perform extractions in a randomized order to avoid processing bias.
- Analysis: Elute all samples in a constant volume. Quantify DNA yield and purity (A260/A280, A260/A230) for each eluate.
- Downstream Assay: Perform your institution's standard downstream assay (e.g., qPCR for a single-copy gene, fragment analyzer) on all eluates.
- Acceptance Criteria: The mean yield, purity, and downstream assay result (e.g., Ct value) of the new lot must be within ±15% of the reference lot, with no statistically significant difference (p > 0.05).
Q3: How should I structure lot tracking data in my lab system to facilitate batch effect investigations?
A: Your laboratory management system (LMS) database should link critical data tables. Essential fields include:
Table 1: Essential Lot Tracking Data Schema
| Table Name | Key Field | Linked To | Purpose |
|---|---|---|---|
| Reagent_Inventory | Lot_Number | Experiment_Runs | Tracks kit receipt, storage, expiry. |
| Experiment_Runs | Sample_ID | ReagentInventory, ResultData | Logs which kit lot was used for each sample. |
| Result_Data | Assay_Result | Experiment_Runs | Stores quantitative output (yield, Ct, purity). |
| BatchEffectFlags | Lot_Number | Reagent_Inventory | Logs any investigation or deviation linked to a specific lot. |
Q4: What are the most common reagent-specific failures in DNA extraction kits that lead to batch effects?
A: Based on current manufacturer advisories and literature, failures often stem from:
Table 2: Common Reagent Failure Points in DNA Extraction Kits
| Reagent Component | Typical Failure Mode | Observed Experimental Consequence |
|---|---|---|
| Proteinase K | Reduced enzymatic activity due to improper storage or formulation. | Incomplete lysis, lower DNA yield, co-purification of inhibitors. |
| Silica-Binding Membrane/Matrix | Inconsistent pore size or charge density between manufacturing batches. | Variable binding efficiency, affecting yield and reproducibility. |
| Wash Buffers | Incorrect pH or ethanol concentration. | Incomplete inhibitor removal or DNA retention issues, impacting purity and downstream PCR. |
| Elution Buffer | Sub-optimal pH or presence of chelating agents. | Reduced DNA stability over time and variable A260/A280 ratios. |
The Scientist's Toolkit: Research Reagent Solutions
Table 3: Essential Materials for Batch Effect Mitigation Research
| Item | Function in Batch Effect Studies |
|---|---|
| Certified Reference Material (CRM) | Provides a homogeneous, standardized biological sample for inter-lot and inter-kit performance comparisons. |
| Synthetic DNA Spike-In Controls | Defined oligonucleotides added to lysis to monitor extraction efficiency and identify at which step a failure occurs. |
| Digital PCR (dPCR) System | Enables absolute quantification of DNA without a standard curve, providing highly precise data for lot-to-lot comparison. |
| Fragment Analyzer / Bioanalyzer | Assesses DNA integrity and size distribution, catching batch-related issues like increased shearing or contamination. |
| Laboratory Information Management System (LIMS) | The core platform for logging kit lot numbers, expiry dates, and linking them directly to experimental results for traceability. |
Experimental Workflow for Batch Investigation
Title: Batch Effect Investigation Workflow in LMS
DNA Extraction Kit Batch Effect Mitigation Strategy
Title: Proactive Kit Lot Management & Mitigation Pathway
Troubleshooting Guides and FAQs
FAQ 1: We are implementing new DNA extraction kits. How do we design a proper QC experiment using reference materials to detect batch effects? Answer: Design a controlled crossover experiment. Process the same set of characterized reference materials (e.g., cell line DNA, synthetic spike-ins) with both the old (current validation) and new (incoming) kits or reagent lots in parallel. Include replicates and negative controls. Key metrics for comparison are detailed in Table 1.
FAQ 2: What specific QC metrics should we compare when testing a new kit lot using reference materials? Answer: The core metrics fall into three categories: Yield/Purity, Integrity, and Performance in Downstream Assays. Reference materials with known concentrations and profiles are essential for this comparison.
Table 1: Key QC Metrics for DNA Extraction Kit/Lot Comparison Using Reference Materials
| Metric Category | Specific Measurement | Tool/Method | Acceptance Criterion for New Lot |
|---|---|---|---|
| Yield & Purity | DNA Concentration (ng/µL) | Fluorometry (e.g., Qubit) | Within ±20% of old lot mean |
| A260/A280 Ratio | Spectrophotometry (e.g., Nanodrop) | 1.8 - 2.0 | |
| A260/A230 Ratio | Spectrophotometry | >2.0 | |
| DNA Integrity | DNA Integrity Number (DIN) or Degradation Factor (DF) | Automated Electrophoresis (e.g., TapeStation, Bioanalyzer) | DIN ≥ 7 (or comparable to old lot) |
| Functional Performance | qPCR Amplification (Cq value) | qPCR assay for a single-copy gene | ΔCq vs. old lot ≤ 0.5 |
| Library Prep Efficiency | NGS Library Yield (nM) | Within ±15% of old lot mean | |
| Variant Allele Frequency (VAF) Accuracy | ddPCR or NGS on reference standard | Reported VAF within ±5% of expected |
FAQ 3: Our NGS data shows increased PCR duplicate rates with the new extraction kit lot. What could be the cause, and how can we troubleshoot it? Answer: Increased duplicate rate often indicates lower input DNA complexity, typically from reduced yield or fragmentation. Follow this troubleshooting pathway:
Diagram Title: Troubleshooting High NGS Duplicate Rates from New Extraction Lots
FAQ 4: Can you provide a detailed protocol for the parallel QC extraction experiment? Answer: Yes. This protocol is designed for robust batch effect detection.
Experimental Protocol: Parallel QC Extraction for Kit/Lot Validation
Objective: To compare the performance of a new DNA extraction kit/reagent lot against the currently validated lot using standardized reference materials. Materials:
- Reference Material: e.g., Coriell Institute cell line pellets (GM12878), Seraseq FFPE DNA Reference Material, or externally sourced human gDNA.
- Test Kits: Currently validated lot (Lot A) and incoming new lot (Lot B).
- Equipment: Microcentrifuge, vortex, thermomixer, fluorometer, electrophoresis system.
Procedure:
- Sample Preparation: Aliquot identical amounts of the reference material into 6 tubes for a paired design (n=3 per kit lot).
- Parallel Processing: Perform DNA extraction according to the manufacturer's protocol simultaneously for all samples. One experienced technician should process both lots to minimize operator variability.
- Control Inclusion: Include a negative control (lysis buffer only) for each kit lot.
- Elution: Elute all samples in an identical volume of elution buffer.
- QC Analysis: a. Quantification: Measure DNA concentration using a fluorometric assay (e.g., Qubit dsDNA HS). Record yield (total ng). b. Purity: Measure A260/A280 and A260/A230 ratios via spectrophotometry. c. Integrity: Analyze 10-50 ng of DNA on a genomic DNA tape (e.g., Agilent TapeStation) to determine the DNA Integrity Number (DIN).
- Functional Assay: Dilute all samples to a standard concentration (e.g., 5 ng/µL). Perform a qPCR assay targeting a single-copy gene (e.g., RNase P, HBB). Compare the mean Cq values between Lot A and Lot B groups using a t-test (p < 0.05 indicating significant difference).
FAQ 5: What are the essential reagents and tools needed to establish this QC system? Answer: The Scientist's Toolkit for in-lab QC of extraction kits is as follows:
Table 2: Research Reagent Solutions for Extraction QC
| Item | Function in QC | Example Product/Type |
|---|---|---|
| Characterized Reference Material | Provides a consistent, known-input sample for fair kit-to-kit comparison. | Cell line-derived gDNA (e.g., NA12878), synthetic spike-in controls (e.g., SeraCare). |
| Fluorometric DNA Quantitation Kit | Accurately measures double-stranded DNA concentration without interference from RNA or contaminants. | Qubit dsDNA HS Assay, Picogreen. |
| Automated Electrophoresis System | Objectively assesses DNA size distribution and integrity (DIN/DF). | Agilent TapeStation, Bioanalyzer. |
| qPCR Master Mix & Assay | Tests the functional amplifiability of extracted DNA and detects PCR inhibitors. | TaqMan assays for single-copy genes. |
| Digital PCR (ddPCR) Assay | Provides absolute, precise quantification of target loci and variant allele frequencies for ultra-sensitive bias detection. | Bio-Rad ddPCR Mutation Assay. |
| Standardized Inhibitor Spike | Deliberately adds known inhibitors (e.g., heparin, humic acid) to test the robustness of the new kit's purification. | Internally prepared or commercially sourced inhibitor cocktails. |
Diagram Title: In-Lab QC Workflow for New Extraction Kits and Reagent Lots
Standardized Protocol Adherence and Technician Training to Minimize Operator-Induced Variability
Technical Support Center: Troubleshooting DNA Extraction
Frequently Asked Questions (FAQs)
Q1: Why is there significant variability in my extracted DNA yield and purity between technicians using the same kit and sample type? A: This is a classic operator-induced variability issue. Primary causes include inconsistent sample homogenization techniques, variations in incubation timing during lysis or proteinase K digestion, and inconsistent pipetting during binding/washing steps. Adherence to a standardized, timed protocol with defined vortexing speeds and durations is critical.
Q2: My downstream PCR fails intermittently, and I suspect inhibitors from the extraction. Which step is most prone to operator error leading to inhibitor carryover? A: The wash steps are most critical. Incomplete removal of Wash Buffer 1 (often containing guanidine salts) or Wash Buffer 2 (ethanol) due to insufficient centrifugation time, overloading of the column, or failure to discard the flow-through collection tube between washes are common errors. Ensure the spin column is dry after the final ethanol wash by running an extra centrifugation step.
Q3: How does technician handling affect the assessment of "batch effects" in DNA extraction kits? A: Uncontrolled operator variability can mask or be mistaken for a true reagent batch effect. If protocols are not locked down and technicians are not trained to the same standard, performance differences between kit lots cannot be reliably isolated. Consistent technique is a prerequisite for valid batch-to-batch comparison.
Q4: What is the most effective way to track and minimize pipetting variability across a lab team? A: Implement mandatory regular calibration of all pipettes (e.g., quarterly) using a gravimetric method. For critical steps, use single-channel pipettes instead of multi-channels, and mandate pre-wetting of tips for viscous solutions like lysis buffer. Consider using automated liquid handlers for the most sensitive steps.
Troubleshooting Guides
Issue: Low DNA Yield
- Check 1: Verify tissue lysis is complete. For tissue, ensure correct sized beads are used and homogenizer settings (time, speed) are strictly followed.
- Check 2: Confirm incubation temperatures. Proteinase K digestion is less efficient below 56°C.
- Check 3: Ensure ethanol was added to the binding buffer if required. Check reagent lot documentation.
- Check 4: Do not exceed the recommended binding capacity of the silica column.
Issue: Low DNA Purity (A260/A280 ratio outside 1.8-2.0)
- Low Ratio (<1.8): Protein contamination. Ensure sufficient Proteinase K digestion time and that wash buffers are prepared with the correct ethanol concentration.
- High Ratio (>2.0): RNA contamination or residual guanidine. Incorporate an RNase A digestion step. Ensure complete washing with Wash Buffer 1.
Issue: Inconsistent Fragment Size Distribution
- Check 1: Avoid vigorous vortexing or pipetting of lysates after lysis, which can shear genomic DNA.
- Check 2: Do not let the spin column dry completely during wash steps before adding the next solution.
- Check 3: Elution buffer pH is critical; ensure it is between 7.5-8.5. Pre-heat elution buffer to 55°C for higher yield.
Data Presentation: Common Operator Errors and Impact
Table 1: Impact of Protocol Deviations on DNA Yield and Purity
| Protocol Deviation | Average Yield Reduction | A260/A280 Deviation | Primary Cause |
|---|---|---|---|
| Incorrect Homogenization Time | 35% | ±0.15 | Incomplete cell lysis |
| Variation in Proteinase K Incubation (±10 min) | 15% | -0.22 | Partial protein digestion |
| Ethanol Concentration in Wash Buffer (±5%) | 20% | +0.30 | Incomplete inhibitor removal |
| Overloading Spin Column (2x capacity) | 40% | -0.25 | Silica membrane saturation |
| Inconsistent Elution Buffer Volume | N/A (Variable Conc.) | ±0.05 | Elution efficiency variance |
Experimental Protocols
Protocol 1: Internal Batch Effect Monitoring with Controlled Technique
Purpose: To distinguish true kit reagent batch effects from operator-induced variability. Methodology:
- Standardized Training: Train all participating technicians using a certified SOP with video demonstrations. Require competency assessment using a control sample.
- Reagent Blinding: Label extraction kits from multiple lots (e.g., Lot A, B, C) with blind codes.
- Sample Design: Use a commercially available reference DNA sample or a uniformly prepared cell pellet aliquots as the standardized input material.
- Blocked Experiment Design: Each technician extracts 3 replicates from each blind-coded kit lot in a randomized order over multiple days.
- Output Measurement: Quantify DNA yield (fluorometry), purity (spectrophotometry), and functionality (qPCR amplification efficiency of a single-copy gene).
- Statistical Analysis: Perform ANOVA with factors for Technician, Kit Lot (Blind Code), and Day. A significant Lot effect after accounting for Technician indicates a probable batch effect.
Protocol 2: Gravimetric Pipette Calibration Check
Purpose: To quantify and correct for pipetting inaccuracies, a major source of variability. Methodology:
- Equipment: Analytical balance (0.001 mg precision), distilled water, temperature probe, calibrated pipette and tips.
- Environmental Control: Perform in a draft-free area. Record water temperature and atmospheric pressure.
- Procedure: Set pipette to target volume (e.g., 1000 µL). Dispense water into a weighed vessel 10 times. Record mass of each dispense.
- Calculation: Convert mass to volume using Z-factor for water at recorded temperature. Calculate mean volume, accuracy (deviation from set volume), and precision (coefficient of variation).
- Action: If outside manufacturer specifications (e.g., ±1% accuracy, <0.5% CV), the pipette must be serviced.
Visualizations
Diagram 1: Operator Variability vs. Batch Effect Decision Tree
Diagram 2: DNA Extraction Workflow with Critical Control Points
The Scientist's Toolkit
Table 2: Essential Research Reagent Solutions for DNA Extraction QA/QC
| Item | Function in Mitigating Variability |
|---|---|
| Certified Reference DNA Sample | Provides a uniform input material to control for sample-based variability across experiments and operators. |
| RNase A, Molecular Grade | Ensures removal of RNA contamination, preventing inflated A260/280 ratios and ensuring accurate DNA quantification. |
| Proteinase K, >600 mAU/mL | Critical for complete tissue digestion and protein removal; activity must be verified with new lots. |
| Ethanol, 200 Proof, Molecular Biology Grade | Used in wash and binding buffers; concentration accuracy is vital for proper binding and removal of inhibitors. |
| TE Buffer (pH 8.0), Nuclease-Free | Preferred elution buffer for long-term DNA storage; consistent pH is crucial for elution efficiency and stability. |
| Fluorometric DNA Quantification Dye | Provides accurate, specific double-stranded DNA quantification vs. spectrophotometry, which detects contaminants. |
| qPCR Master Mix with Single-Copy Gene Assay | Functional QC to assess DNA integrity and presence of PCR inhibitors extracted from the sample matrix. |
| Gravimetric Pipette Calibration Kit | For mandatory regular verification of pipette accuracy and precision, the root of liquid handling error. |
Incorporating External RNA/DNA Controls (ERCs/EDCs) for Process Monitoring
Technical Support Center
Troubleshooting Guides & FAQs
Q1: Our ERC/EDC recovery yields are consistently low across all samples in a batch. What are the primary causes and solutions? A: Low recovery of external controls typically indicates inefficiency during the lysis or binding stages of extraction.
- Check 1: Inadequate Homogenization. Ensure the control spike-in is thoroughly mixed with the sample lysate. Vortex vigorously for 30 seconds after addition.
- Check 2: Binding Capacity Exceeded. The total nucleic acid input (sample + spike-in) may exceed the column's binding capacity. Reduce sample input mass or use a kit with higher capacity.
- Check 3: Ethanol Precipitation Issues. For protocols requiring it, ensure ethanol is fresh and of the correct concentration (usually 96-100%). Verify pH of the binding buffer.
- Protocol Adjustment: Re-spike the ERC/EDC after the initial lysis step but before the binding step to bypass lysis efficiency variables, focusing the control solely on purification performance.
Q2: We observe high variability (high CV%) in ERC/EDC quantification between replicate samples. How can we improve reproducibility? A: High inter-replicate variability points to pipetting errors or inconsistent handling.
- Solution 1: Use a Dedicated, Calibrated Pipette. Use a positive-displacement or a recently calibrated air-displacement pipette for spiking the small volumes of ERC/EDC stock solution.
- Solution 2: Prepare a Master Mix. Dilute the ERC/EDC to a working concentration in the same buffer used to resuspend or dilute your samples. Create a master mix of "sample + spike-in" before aliquoting to replicates.
- Solution 3: Mix Thoroughly. After spiking, mix by pipetting up and down 10 times, followed by a brief vortex.
Q3: The ERC signal is stable, but the endogenous target of interest is degraded. What does this indicate? A: This result is a key strength of using ERCs/EDCs. It indicates that the extraction process itself was efficient, but the sample's intrinsic quality was poor (e.g., RNA was degraded in the original tissue or blood sample prior to extraction). The control localizes the problem to pre-extraction steps.
- Action: Review sample collection, storage, and transport protocols. Ensure tissues are snap-frozen rapidly or stored in appropriate stabilizing reagents.
Q4: Can ERCs/EDCs definitively identify batch-to-batch kit variability? A: Yes, when used systematically. By including the same ERC/EDC spike across extractions performed with different kit lots, the control serves as an internal process standard.
- Experimental Design: Extract identical, homogeneous sample pools with Kit Lot A, B, and C. Spike the same amount of ERC/EDC into each.
- Interpretation: A statistically significant difference in ERC/EDC recovery (e.g., yield, Cq value) between lots, under identical conditions, directly indicates a batch effect attributable to the extraction kit's performance.
Q5: How do we select the optimal concentration for spiking an ERC/EDC? A: The concentration must be detectable but not inhibitory.
- Perform a spike-in titration experiment (see protocol below).
- The ideal concentration is one that gives a robust, early Cq value (e.g., Cq 18-24) without altering the Cq of your endogenous targets (indicating no competition).
Experimental Protocol: ERC/EDC Spike-in Titration for Optimization
Objective: To determine the optimal concentration of an external control that does not interfere with the detection of endogenous nucleic acids.
Materials: Homogeneous sample pool, ERC/EDC stock (e.g., 10^6 copies/µL), chosen DNA/RNA extraction kit, qPCR/qRT-PCR system with assays for ERC/EDC and a medium-abundance endogenous target.
Method:
- Prepare Spike-in Dilutions: Serially dilute the ERC/EDC stock in nuclease-free water (e.g., from 10^5 to 10^1 copies/µL).
- Aliquot Sample: Distribute 100 µL of your homogeneous sample pool into 5 tubes.
- Spike: Add 5 µL of each dilution to a separate sample tube. Include a no-spike control.
- Extract: Perform nucleic acid extraction according to the kit's standard protocol.
- Quantify: Elute in a standard volume (e.g., 50 µL). Run qPCR for both the ERC/EDC and an endogenous reference gene.
- Analyze: Plot the Cq values of the endogenous gene against the log of the spiked ERC/EDC copy number.
Interpretation: The optimal spike-in level is the highest concentration that does not cause a delay (≥1 Cq) in the detection of the endogenous target compared to the no-spike control.
Quantitative Data Summary: Simulated Titration Experiment Results
Table 1: Example Data from ERC Titration Experiment for Kit QA
| Spike-in Level (copies/µL lysate) | Mean ERC Cq (SD) | Mean Endogenous GAPDH Cq (SD) | ΔCq vs. No-Spike Control |
|---|---|---|---|
| No Spike (Control) | Undetected | 22.1 (0.3) | 0.0 |
| 10^1 | 32.5 (0.8) | 22.2 (0.4) | +0.1 |
| 10^2 | 28.9 (0.4) | 22.0 (0.3) | -0.1 |
| 10^3 | 25.2 (0.3) | 22.3 (0.5) | +0.2 |
| 10^4 | 21.8 (0.2) | 22.5 (0.4) | +0.4 |
| 10^5 | 18.3 (0.2) | 23.8 (0.6) | +1.7 |
Conclusion: A spike of 10^4 copies/µL is optimal, providing a strong ERC signal (Cq ~22) without inhibiting endogenous target detection.
Visualization: ERC/EDC Workflow for Batch Effect Monitoring
Title: ERC Workflow for Detecting Extraction Kit Batch Effects
The Scientist's Toolkit: Key Research Reagent Solutions
Table 2: Essential Materials for ERC/EDC Process Monitoring
| Item | Function & Rationale |
|---|---|
| Non-competitive Synthetic ERC/EDC | A synthetic nucleic acid sequence with no homology to the target organism's genome. It is spiked into the sample to monitor extraction efficiency without cross-reacting or competing with endogenous targets. |
| Homogeneous Sample Pool (e.g., Cell Pellet, Tissue Lysate) | A large, well-mixed biological sample aliquoted for experiments. Essential for controlling biological variability when testing technical variables like kit lot. |
| qPCR/qRT-PCR Master Mix with dUTP/UNG | Contains enzymes, dNTPs, and buffer for target amplification. dUTP/UNG system prevents amplicon carryover contamination, crucial for accurate low-copy detection. |
| Target-specific Primers/Probes for ERC/EDC | Validated assay for specific, high-efficiency amplification of the spiked control. Enables precise quantification of recovery. |
| Digital Pipettes (e.g., 0.1-2 µL, 2-20 µL) | Precision instruments for accurate volumetric transfer of small volumes. Critical for reproducible spiking of concentrated ERC/EDC stocks. |
| Nuclease-free Water & Tubes | Certified free of RNases and DNases. Prevents degradation of controls and samples, ensuring signal integrity. |
| Standardized Nucleic Acid Extraction Kit | The kit being evaluated. Using the same protocol across all tests isolates the variable of interest (e.g., lot number). |
Diagnosing and Correcting Batch Effects: A Step-by-Step Troubleshooting Guide
Technical Support Center: Troubleshooting & FAQs
Frequently Asked Questions
Q1: I ran PCA on my gene expression data from multiple DNA extraction kit batches, and the first two principal components separate perfectly by batch, not by biological condition. What does this mean, and what should I do next?
A1: This is a classic sign of a strong batch effect. It indicates that technical variation introduced by using different kit batches is greater than the biological variation you aim to study. Your next steps should be:
- Confirm: Use hierarchical clustering on the samples. If the dendrogram primarily groups samples by batch rather than condition, this confirms the PCA result.
- Document: Record all batch metadata (kit lot number, extraction date, operator).
- Mitigate: Apply a batch effect correction tool (e.g., ComBat, limma's
removeBatchEffect) after confirming the effect, but before downstream differential expression analysis. Always validate that correction preserves biological signal.
Q2: After applying batch correction, my negative controls are no longer clustering together. Is this a problem?
A2: Yes, this is a critical red flag. Batch correction algorithms assume the batch effect is the unwanted technical variation. If your negative controls (which should have minimal biological variation) diverge after correction, it suggests the algorithm may be over-correcting and removing real biological signal or introducing artifacts.
- Troubleshooting Action: Re-run the correction, adjusting parameters if possible. Compare the results with a simpler method like mean-centering per batch. Always keep an uncorrected version of your data for comparison. This underscores the need for control samples in every batch.
Q3: What is the minimum number of samples per batch needed to reliably detect batch effects using these tools?
A3: While more is always better, a minimum of 3-5 samples per batch is generally required to estimate batch-specific variance reliably. With fewer samples, tools like PCA may still show separation, but statistical methods for correction will be underpowered and unstable.
Q4: My hierarchical clustering shows some, but not perfect, grouping by batch. How do I decide if the batch effect is severe enough to require formal correction?
A4: Perform a quantitative assessment. Use a statistical test like PERMANOVA (on the principal components) or a linear model to partition variance. The following table provides a rule-of-thumb guideline:
Table 1: Assessing Batch Effect Severity
| Metric | Mild Effect | Severe Effect | Action |
|---|---|---|---|
| Visual PCA/HC | Slight batch grouping trend | Clear, distinct clustering by batch | Correction likely needed if severe. |
| PERMANOVA p-value (Batch) | > 0.05 | < 0.01 | Significant p-value warrants correction. |
| Variance Explained (Batch)* | < 10% of total | > 20% of total | Correct if batch explains more variance than key biological factor. |
*Estimated via variancePartition or similar.
Key Experimental Protocols
Protocol 1: Systematic Detection of DNA Extraction Kit Batch Effects
Objective: To identify and quantify technical variation attributable to different lots of a DNA extraction kit.
- Experimental Design: Split a large, homogeneous biological sample (e.g., cell pellet pool) into multiple technical replicates.
- Batch Introduction: Extract DNA from these replicates across at least two different kit lots/batches and over at least two different days.
- Downstream Processing: Process all samples simultaneously through library prep, sequencing, and bioinformatics pipeline to isolate the extraction variable.
- Data Analysis:
- Generate a gene expression or methylation matrix.
- Perform PCA. Color samples by Kit Lot and Extraction Date.
- Perform Hierarchical Clustering. Use correlation distance and complete linkage. Annotate dendrogram with batch metadata.
- Statistical Test: Run
sva::svaseq()orpvca::PVCA()to estimate percent variance contributed by the batch factors.
Protocol 2: Validating Batch Correction in the Context of Differential Expression
Objective: To ensure batch correction mitigates technical noise without compromising biological signal.
- Use a Spiked-in Control: Include samples with known differential expression (e.g., synthetic RNA spikes, treated vs. untreated cell lines) across batches.
- Analyze in Three States:
- Raw: Analyze uncorrected data.
- Corrected: Analyze data after applying your chosen correction (e.g., ComBat).
- Ideal (if possible): Analyze data from a single-batch experiment.
- Compare Metrics: For the known differential features, calculate and compare:
- Log2 fold change accuracy and precision.
- P-value distribution for non-differential features (should be uniform).
Data Presentation
Table 2: Comparison of Batch Effect Detection & Correction Tools
| Tool/Method | Primary Use | Key Inputs | Output | Advantages | Limitations |
|---|---|---|---|---|---|
| PCA | Visualization | Normalized expression matrix | Scatter plot (PC1 vs PC2) | Intuitive, fast, no model assumptions | Descriptive only; can miss complex effects. |
| Hierarchical Clustering | Visualization | Distance matrix (e.g., 1 - cor) | Dendrogram | Shows sample-wise relationships holistically | Results depend on distance metric/linkage choice. |
| sva (Surrogate Variable Analysis) | Detection/Correction | Expression matrix, model | Surrogate variables, corrected data | Models unknown confounders, powerful for RNA-seq | Can be computationally intensive. |
| ComBat (sva package) | Correction | Expression matrix, batch covariate | Batch-adjusted matrix | Removes known batch effects, preserves biological signal. | Assumes batch effect is additive/multiplicative; can over-correct. |
| PVCA (Principal Variance Component Analysis) | Quantification | Expression matrix, model | Variance % per factor | Quantifies contribution of multiple batch factors. | Requires balanced design for best results. |
The Scientist's Toolkit: Research Reagent Solutions
Table 3: Essential Materials for Batch Effect Mitigation Experiments
| Item | Function in Batch Effect Research |
|---|---|
| Reference Standard Material (e.g., Coriell Cell Pools, Synthetic Spikes) | Provides a homogeneous, biologically stable sample to be split across batches for isolating technical variance. |
| Multiple Kit Lots/Batches | The intentional variable to test for lot-to-lot reagent or consumable variability. |
| Internal Control Spikes (e.g., ERCC RNA Spikes) | Added at extraction or pre-amplification to monitor technical variability through the pipeline. |
| Automated Nucleic Acid Extractor | Reduces operator-induced variability compared to manual extraction, standardizing incubation and pipetting times. |
| Quantitation Standard (e.g., Qubit dsDNA HS Assay) | Accurate, dye-based DNA/RNA quantitation critical for normalizing input across batches. |
| Digital Sample Management System (e.g., LIMS) | Tracks all sample and batch metadata (lot numbers, dates, instrument IDs) to ensure accurate modeling. |
Visualizations
Batch Effect Detection & Mitigation Workflow
Interpreting PCA Results for Batch Effects
Troubleshooting Guide: Batch Failure Decision-Making
This guide is designed for the post-extraction phase of research focused on mitigating DNA extraction kit batch effects. It provides a structured approach to determine when re-extraction from source material is necessary versus when alternative actions are sufficient.
Decision Tree Workflow for Batch Issues
Diagram 1: Decision Flow for Extraction Batch Issues
Key QC Thresholds for Common Downstream Assays The following table summarizes critical quantitative benchmarks that should trigger movement down the decision tree.
| QC Metric | Acceptable Range | Caution Range | Re-Extract Threshold | Primary Risk if Proceeded |
|---|---|---|---|---|
| DNA Yield (from standard tissue) | ≥ Protocol Expected Mean | 50-80% of Expected Mean | <50% of Expected Mean | Failed library prep; loss of rare variants. |
| A260/280 Ratio | 1.8 - 2.0 | 1.7 - 1.79 or 2.01 - 2.1 | <1.7 or >2.1 | Protein/phenol contamination inhibits enzymes. |
| A260/230 Ratio | 2.0 - 2.2 | 1.5 - 1.9 | <1.5 | Salts, chaotropic agents, or organic solvent carryover. |
| qPCR (Ct Delay)* | ΔCt ≤ 1.5 vs. Batch Controls | ΔCt 1.6 - 3.0 vs. Batch Controls | ΔCt > 3.0 vs. Batch Controls | False negatives in low-template assays; skewed quantification. |
| Fragment Analyzer DV200 (for FFPE) | ≥ 50% | 30% - 49% | < 30% | Poor NGS library complexity and coverage. |
*ΔCt = Average Ct of samples in suspect batch minus average Ct of same sample types in a validated control batch.
Frequently Asked Questions (FAQs)
Q1: Our extraction batch shows abnormally low yields but normal purity ratios. Should we re-extract?
A: Low yield with normal purity often points to inefficient lysis or binding, not contamination. First, perform a corrective action: repeat the extraction using a fresh aliquot of the same source material with increased lysis incubation time or proteinase K volume. If yield normalizes, the original batch data can be used with a yield-based normalization factor in downstream analysis. If the low yield persists with the new reagents, a kit component failure is likely, and re-extraction of all batch samples is required.
Q2: We detected microbial DNA contamination (via 16s PCR) in our mammalian DNA extraction batch. Is re-extraction always mandatory?
A: Yes, for most sensitive applications. Microbial contamination indicates a breakdown in sterile technique or a contaminated kit reagent (e.g., lysozyme, buffer). This confounds host-microbiome studies and can inhibit enzymatic reactions. Re-extraction is mandatory using a new, confirmed sterile batch of kits and stringent aseptic technique. Data from the contaminated batch should be quarantined.
Q3: A batch has slightly off A260/230 ratios (~1.6) but otherwise passes QC. Can we proceed for NGS?
A: Proceed with extreme caution and flag the data. Low A260/230 suggests residual guanidinium salts or ethanol, which can suppress downstream enzymatic steps like ligation and PCR. Protocol: Perform an additional post-extraction ethanol precipitation or solid-phase reversible immobilization (SPRI) clean-up on all samples in the batch. Re-quantify. If ratios correct, you may proceed, but include internal controls to monitor library prep efficiency. If ratios remain low, re-extraction is advised for quantitative applications.
Q4: How can we definitively prove an issue is batch-wide and not just a few bad samples?
A: Implement a cross-batch diagnostic experiment.
- Select Test Samples: Use 3 remaining source materials with ample volume.
- Parallel Extraction: Re-extract each test sample using: a) Reagents from the suspected batch, b) Reagents from a new, validated batch, c) A different extraction method/platform (if available).
- Analysis: Compare yield, purity, and performance in a target-specific assay (e.g., qPCR for a housekeeping gene) across all three extracts.
- Interpretation: If the suspected batch consistently underperforms across all test samples compared to the other two methods, the fault is batch-wide.
Experimental Protocol: Diagnostic qPCR for Batch Inhibition
Objective: Quantify inhibition and functional DNA quality by comparing Ct shifts of a spiked-in exogenous control.
Materials:
- Test DNA samples from suspect batch.
- Control DNA from a validated batch.
- TaqMan Exogenous Control Assay (e.g., Applied Biosystems TaqMan Exogenous Internal Positive Control).
- Real-Time PCR system.
Method:
- Spike-In: Add a known, constant amount of the exogenous control DNA (IPC) to each test and control DNA sample and to a nuclease-free water (no-template control, NTC) sample prior to PCR setup.
- qPCR Setup: Run the exogenous control assay according to manufacturer specs on all samples.
- Analysis: Calculate ΔΔCt. ΔCt(sample) = Ct(IPC in sample) - Ct(IPC in NTC). Compare ΔCt values between the suspect batch and the control batch.
- Decision: A significant ΔΔCt (>2-3 cycles) indicates the presence of inhibitors in the suspect batch, warranting re-extraction or intensive clean-up.
The Scientist's Toolkit: Key Research Reagent Solutions
| Item | Function in Batch Effect Mitigation |
|---|---|
| Commercial Carrier RNA | Enhances recovery of low-concentration and fragmented DNA, improving consistency across batches, especially critical for FFPE and liquid biopsy samples. |
| Internal Positive Control (IPC) Spikes (e.g., synthetic DNA sequences) | Added pre-extraction to monitor extraction efficiency and detect inhibition specific to a batch. |
| Process Calibrator Samples (e.g., commercially available reference DNA, cell line pellets) | Included in every extraction batch to track inter-batch performance variability and normalize data. |
| Inhibitor Removal Beads/Columns (e.g., SPRI beads, dedicated clean-up kits) | Used for post-extraction remediation of batches with suboptimal purity (A260/230) to potentially salvage samples. |
| Dual-Dye Fluorescent Quantitation Assay (e.g., Qubit dsDNA HS) | Provides specific DNA concentration, unaffected by common batch contaminants (salts, RNA) that skew UV-spectrophotometry. |
| Target-Specific qPCR Proficiency Assay | Measures functional integrity of DNA for the intended downstream application (e.g., amplification of a long amplicon for WGS suitability). |
Diagram 2: Proactive QC Integration in Workflow
Troubleshooting Guides & FAQs
Q1: During DNA extraction from a challenging sample (e.g., FFPE tissue) using a new kit lot, my yield and purity (A260/280) are consistently low. What are the first protocol adjustments to consider? A1: This is a classic symptom of batch-specific variation in lysis or binding buffer efficiency. Primary adjustments include:
- Increased Lysis Incubation: Extend proteinase K digestion time by 50-100% (e.g., from 1 hour to 1.5-2 hours for FFPE samples) and increase temperature to 56°C if not already maximal.
- Carrier RNA Supplementation: If the new lot's binding conditions are suboptimal, add 1-2 µg of purified carrier RNA (e.g., poly-A RNA) to the lysis mixture before adding binding buffer to improve nucleic acid precipitation.
- Binding Buffer Volume Adjustment: Increase the volume of kit-provided binding buffer or ethanol by 10-25% to compensate for potential lot-to-lot concentration differences.
Q2: My qPCR results show high Ct variability and poor amplification efficiency since switching to a new extraction kit batch, despite good spectrophotometric yields. What is the likely cause and solution? A2: This indicates co-purification of batch-specific PCR inhibitors (e.g., guanidine salts, solvents). Mitigation strategies are:
- Post-Extraction Purification: Perform a clean-up using silica-column kits or SPRI bead-based protocols with an 80% ethanol wash.
- Dilution Test: Perform a 1:5 and 1:10 dilution of your DNA template in nuclease-free water. A significant decrease in Ct with dilution confirms inhibitor presence.
- Protocol Adjustment: Increase the number of wash steps in the original protocol by one, and ensure wash buffers are allowed to incubate on the column/membrane for 1 minute before centrifugation.
Q3: How can I systematically determine if poor NGS library prep performance is due to the extraction kit batch versus other reagents? A3: Implement a Spike-In Recovery Experiment.
- Spike a non-human, quantitated control DNA (e.g., Lambda phage, Pseudomonas aeruginosa DNA) at a known concentration (e.g., 0.1% of total expected DNA) into your lysis buffer before extraction.
- Extract samples using the old (control) lot and new (problematic) lot in parallel.
- Post-extraction, use a targeted qPCR assay specific to the spike-in DNA to calculate percent recovery.
- A significant drop in spike-in recovery with the new lot directly implicates the extraction kit.
Experimental Protocols
Protocol 1: Diagnostic Spike-In Recovery Assay for Batch Effect Confirmation Purpose: To quantitatively assess the nucleic acid capture efficiency of a suspected problematic extraction kit lot. Materials: Test samples, reference (control) extraction kit lot, suspected problematic lot, exogenous spike-in DNA (e.g., Linearized pUC19, 50pg/µL), qPCR system with primers for spike-in. Method:
- Aliquot identical sample volumes into two sets of tubes.
- To each tube, add a precise volume of spike-in DNA to achieve a final concentration of 0.5% by mass relative to expected sample DNA.
- Perform extractions on one set with the control lot and the other with the test lot, adhering strictly to the manufacturer's protocol.
- Elute in equal volumes. Quantify total DNA by fluorometry.
- Perform absolute quantification qPCR of the spike-in sequence in both eluates using a standard curve.
- Calculate: % Recovery = (Quantity of spike-in measured post-extraction / Quantity of spike-in added pre-extraction) * 100.
Protocol 2: Modified Binding Condition Optimization for Silica-Membrane Columns Purpose: To troubleshoot low yield from a specific lot by empirically determining the optimal binding buffer:ethanol ratio. Materials: Problematic extraction kit, 100% ethanol, 96-100% isopropanol, pre-lysis sample. Method:
- After complete lysis, split the lysate into 5 equal aliquots.
- Prepare binding mixtures with the kit's binding buffer supplemented with:
- Tube 1: 1.5X volume ethanol (kit standard)
- Tube 2: 2.0X volume ethanol
- Tube 3: 1.0X volume isopropanol
- Tube 4: 1.5X volume of a 1:1 Ethanol:Isopropanol mix
- Tube 5: Use a commercial "enhancer" solution if available.
- Add equal volumes of each binding mixture to each lysate aliquot, mix, and load onto separate columns.
- Complete the protocol identically for all columns.
- Elute and quantify yield and purity. The optimal condition is that which maximizes yield while maintaining A260/280 ~1.8-2.0.
Table 1: Spike-In Recovery Results Comparing Kit Lots A (Control) and B (Problematic)
| Sample Type | Kit Lot | Avg. Total Yield (ng) | Spike-in % Recovery (qPCR) | Purity (A260/280) |
|---|---|---|---|---|
| Cultured Cells | A | 1050 ± 45 | 98.2 ± 3.1 | 1.92 ± 0.03 |
| Cultured Cells | B | 720 ± 62 | 65.4 ± 7.8 | 1.85 ± 0.07 |
| FFPE Tissue | A | 85 ± 12 | 82.5 ± 5.5 | 1.88 ± 0.10 |
| FFPE Tissue | B | 41 ± 9 | 45.3 ± 9.2 | 1.72 ± 0.15 |
Table 2: Effect of Protocol Adjustments on Problematic Lot B Performance
| Adjustment Applied | Avg. Yield Increase (%) | Spike-in Recovery Improvement (%) | Final Purity (A260/280) |
|---|---|---|---|
| Extended Lysis (2h) | +18% | +12% | 1.87 ± 0.05 |
| Added Carrier RNA | +35% | +28% | 1.90 ± 0.03 |
| +20% Binding Buffer | +22% | +15% | 1.84 ± 0.04 |
| Combined (Lysis+Carrier) | +52% | +41% | 1.91 ± 0.02 |
Visualizations
Spike-In Experiment Diagnostic Workflow
Protocol Adjustment Decision Pathways
The Scientist's Toolkit: Key Research Reagent Solutions
| Item | Function in Batch Effect Mitigation |
|---|---|
| Exogenous Spike-In DNA (e.g., Lambda phage, pUC19) | Provides an internal, quantifiable control to measure extraction efficiency independent of variable sample genomics. |
| Carrier RNA (e.g., Poly-A RNA) | Enhances recovery of low-concentration nucleic acids by improving precipitation onto silica membranes, buffering against suboptimal buffer lots. |
| Silica-Coated Magnetic Beads (SPRI Beads) | Enables post-extraction clean-up or can substitute for column-based binding in optimized, lot-independent protocols. |
| Guanidine Hydrochloride (GuHCl) | A common lysis/binding agent. Having a separate, high-purity stock allows for supplementing or standardizing concentrations across kit lots. |
| RNase A / DNase I | Used in diagnostic experiments to check for cross-contamination (e.g., gDNA in RNA prep) that may vary by kit lot. |
| Commercial Inhibitor Removal Beads | Specific resins designed to absorb humic acids, phenolics, or ionic salts; crucial for salvaging inhibitor-laden preps from a bad lot. |
Technical Support Center
Troubleshooting Guides & FAQs
Q1: Our DNA yield decreased by 25% after switching to the new kit lot. What could be the cause? A: A statistically significant drop in yield between lots typically indicates a critical reagent change. First, verify the lysis buffer's Guanidinium Thiocyanate concentration (see Table 1). Perform a side-by-side extraction of a standardized control sample (e.g., cultured cells at 1x10^6 count) using both kits. If the issue persists, it may be due to silica membrane binding efficiency. Troubleshooting steps include: 1) Increasing ethanol percentage in wash buffer by 5% (vol/vol), 2) Extending proteinase K digestion time by 10 minutes, 3) Ensuring elution buffer is pre-heated to 70°C.
Q2: We observed a shift in A260/A280 purity from 1.8-1.9 to 1.6-1.7 with the new lot. How can we restore purity? A: A lowered A260/A280 ratio suggests increased protein or guanidine salt carryover. This is a known batch effect in silica-column based kits. Follow this protocol: 1) Add a second, extended wash step with Wash Buffer 2 (900 µL, 5-minute incubation on column). 2) Centrifuge the empty column for 3 minutes at full speed after the final wash to completely dry the membrane before elution. 3) Validate using the "Salt Carryover Assay" (Protocol 1).
Q3: How do we design and execute a formal bridging study for our NGS workflow? A: A rigorous bridging study requires a multi-level design. See the experimental workflow in Diagram 1. Utilize the materials listed in the "Scientist's Toolkit". The core protocol involves extracting DNA in triplicate from three distinct sample types (e.g., FFPE, whole blood, cell line) using three old lots and three new lots. Analyze yields, purity, integrity (DV200), and functional performance (qPCR amplification efficiency, NGS library prep success). All data should be compiled into comparative tables like Table 2.
Q4: Post-transition, our qPCR CT values are inconsistent. Which kit component is most likely responsible? A: The most probable cause is a change in the composition of the elution buffer (e.g., EDTA concentration or pH). Trace amounts of contaminants can inhibit polymerase activity. Perform a "Spike-in Recovery Experiment": Spike a known quantity of purified DNA into the elution buffers from both the old and new lots, then perform qPCR. A difference in CT > 0.5 cycles indicates inhibition. Mitigate by diluting the eluted DNA or using a PCR inhibitor removal step.
Experimental Protocols
Protocol 1: Salt Carryover Assay for Purity Validation
- Elute DNA: Perform extraction as normal using the new kit lot.
- Prepare Master Mix: For each 20 µL reaction: 10 µL 2X SYBR Green Master Mix, 0.5 µL 10 mM Forward Primer (for a housekeeping gene), 0.5 µL 10 mM Reverse Primer, 7 µL nuclease-free water, 2 µL of eluted DNA sample.
- Control Reaction: Replace the water in the master mix with 7 µL of 1X Wash Buffer 2 from the kit (simulating salt carryover).
- Run qPCR: Use standard cycling conditions. A significant delay (>2 cycles) in the CT of your sample compared to a clean DNA control, or amplification in the buffer control, confirms carryover.
Protocol 2: Formal Bridging Study Design
- Sample Selection: Choose 3 biologically distinct sample matrices relevant to your research (e.g., frozen tissue, plasma, bacterial culture). Include a commercial reference DNA.
- Experimental Matrix: For each sample type, perform extractions in triplicate (n=3) using: a) Last 3 lots of the old kit, b) First 3 lots of the new kit.
- QC Metrics: Quantify each extract by fluorometry. Assess purity (A260/280, A260/230). Run on TapeStation for DNA Integrity Number (DIN) or DV200.
- Functional Assay: Perform a downstream application (e.g., a targeted qPCR assay with low input requirement, or a standardized NGS library prep) on all extracts.
- Statistical Analysis: Use ANOVA to compare yields and purity across lots. For functional data, compare success rates and mean performance metrics with confidence intervals.
Data Presentation
Table 1: Key Reagent Specifications for Lot Comparison
| Reagent Component | Old Lot #XYZ123 Spec | New Lot #ABC456 Spec | Acceptable Range | Test Method |
|---|---|---|---|---|
| Lysis Buffer [Guanidine HCl] | 4.0 M | 4.2 M | 3.9 - 4.3 M | Titration |
| Binding Buffer pH | 5.8 | 5.6 | 5.5 - 6.0 | pH Meter |
| Wash Buffer 1 [Ethanol] | 80% | 82% | 78-85% | GC-MS |
| Elution Buffer pH | 8.5 | 8.0 | 8.0 - 9.0 | pH Meter |
Table 2: Bridging Study Results Summary (Hypothetical Data)
| Sample Type | Metric | Old Lot Mean (n=9) | New Lot Mean (n=9) | % Difference | p-value |
|---|---|---|---|---|---|
| Cultured HeLa Cells | Yield (µg) | 5.2 ± 0.3 | 4.9 ± 0.4 | -5.8% | 0.12 |
| Whole Blood | A260/A280 | 1.82 ± 0.03 | 1.78 ± 0.05 | -2.2% | 0.04* |
| FFPE Tissue | DV200 (%) | 65 ± 8 | 62 ± 10 | -4.6% | 0.45 |
| All | qPCR CT (GAPDH) | 24.1 ± 0.2 | 24.3 ± 0.3 | +0.8% | 0.08 |
Mandatory Visualization
Diagram 1: Bridging Study Experimental Workflow
Title: Workflow for DNA Kit Lot Bridging Study
Diagram 2: Mitigating Batch Effects in Downstream Analysis
Title: Batch Effect Troubleshooting & Mitigation Pathway
The Scientist's Toolkit: Research Reagent Solutions
| Item | Function in Bridging Study |
|---|---|
| Standardized Reference DNA (e.g., NIST SRM 2372) | Provides an absolute control for yield, purity, and functional assays across all lots. |
| Inhibitor-Spike Solution (Humic Acid, IgG, etc.) | Challenges the kit's inhibitor removal capability, testing lot-to-lot consistency. |
| Fragment Analyzer / TapeStation | Quantifies DNA integrity (DIN, DV200), a critical metric for NGS compatibility. |
| Digital PCR (dPCR) Master Mix | Allows absolute quantification of target copies without calibration curves, detecting inhibition. |
| PCR Inhibitor Removal Beads (e.g., SPRI) | Post-extraction clean-up option to mitigate purity issues from new kit lots. |
| Internal Amplification Control (IAC) for qPCR | Distinguishes between low target DNA and PCR inhibition in eluates. |
This technical support center provides guidance for researchers engaged in DNA extraction kit batch effects mitigation research. Effective communication with manufacturers is a critical component of experimental reproducibility and data quality control.
Frequently Asked Questions (FAQs)
Q1: What specific information should I prepare before reporting a suspected batch-specific issue with a DNA extraction kit? A: Before contacting the manufacturer, compile a detailed dossier including: your lot number(s), the exact product name and catalog number, your detailed protocol (including any deviations), the type and source of your sample, the specific QC metrics that failed (e.g., low yield, poor A260/A280, degraded gel profile), and side-by-side data from a control lot if available. Quantitative data is crucial.
Q2: What kind of Quality Control (QC) data can I legally and ethically request from a kit manufacturer? A: You can typically request the Certificate of Analysis (CoA) for your specific lot, which includes QC data like nuclease activity tests, endotoxin levels, and functional performance data (e.g., yield from a standard sample). For in-depth investigations, you may request additional batch-specific characterization data, such as fragment analysis profiles or sequencing-based QC results, though this may require a Material Transfer Agreement (MTA).
Q3: How should I frame my request to ensure collaboration and not confrontation? A: Adopt a collaborative, problem-solving approach. Frame the communication around shared goals of scientific rigor and product improvement. For example: "We are observing inconsistent fragment size distributions between lots A and B in our long-read sequencing prep, which impacts our downstream analysis. Could you share the capillary electrophoresis trace for lot B to help us troubleshoot?"
Q4: What is the standard workflow for escalating a technical issue related to potential batch effects? A: The standard escalation path is: 1) Technical Support (initial report), 2) Applications Scientist (protocol/experimental review), 3) Quality Assurance/Control Department (formal batch investigation), 4. R&D/Senior Management (for persistent or critical issues). Document all interactions.
Q5: Are manufacturers obligated to share proprietary QC methods? A: No. While they must provide QC results that verify specifications, the detailed methodologies are often considered proprietary intellectual property. You can, however, ask for the general principle of the test (e.g., "Is the integrity check based on gel electrophoresis or fragment analyzer?").
Troubleshooting Guides
Issue: Inconsistent Yield/Purity Between Batches in Spin-Column Based Kits
Investigation Protocol:
- Replicate the Issue: Perform parallel extractions using the suspect lot and a known-good control lot on identical, aliquoted samples (n>=3).
- Control the Variables: Use the same equipment, reagents, and technician. Include a "no sample" blank.
- Quantify Broadly: Measure DNA yield (fluorometry preferred over A260), purity (A260/A280, A260/A230), and integrity (gel electrophoresis).
- Formalize Data: Summarize results in a comparison table (see below). This structured data is essential for your report to the manufacturer.
Quantitative Data Summary Table: Suspected Batch Effect on Human PBMC DNA Extraction
| QC Metric | Control Lot #X123 (Mean ± SD) | Suspect Lot #Y456 (Mean ± SD) | p-value (t-test) | Spec. Threshold |
|---|---|---|---|---|
| Yield (ng/10^6 cells) | 3450 ± 210 | 2850 ± 450 | 0.03 | >3000 |
| A260/A280 Ratio | 1.82 ± 0.03 | 1.75 ± 0.07 | 0.04 | 1.7-2.0 |
| A260/A230 Ratio | 2.10 ± 0.10 | 1.65 ± 0.25 | 0.01 | >1.8 |
| Passes Gel Integrity | 3/3 | 1/3 | N/A | Clear high MW band |
Issue: Batch-Specific Inhibition in Downstream PCR/qPCR
Investigation Protocol:
- Isolate the Variable: Perform PCR/qPCR on a standardized DNA template (e.g., control plasmid) spiked into the eluates from extractions of a blank (water) sample using both kit lots.
- Run Dilution Series: Test a dilution series of the spiked eluates to identify inhibition patterns.
- Use an Internal Control: Include a multiplexed internal positive control in your assay to confirm inhibition.
- Request Data: Ask the manufacturer for residual solvent analysis data (e.g., ethanol, isopropanol) for the binding and wash buffers from the suspect lot, as carryover is a common cause of inhibition.
Batch Effect Investigation and Reporting Workflow
Key Research Reagent Solutions for Batch Effects Mitigation Studies
| Item | Function in Batch Effect Research |
|---|---|
| Standard Reference Material (e.g., NIST SRM 2372a) | Provides a homogenized, well-characterized human DNA source for inter-lot and inter-batch kit performance comparisons under controlled conditions. |
| Synthetic Spike-In Controls | Defined oligonucleotide or pathogen DNA sequences added to samples pre-extraction to monitor recovery efficiency and identify batch-specific biases. |
| Digital PCR (dPCR) Assay Kits | Enables absolute quantification of target molecules without standard curves, crucial for precisely measuring extraction yield variations between lots. |
| Fragment Analyzer / Bioanalyzer Kits | Provides high-resolution nucleic acid size distribution profiles, essential for detecting batch-related differences in shearing or integrity. |
| Inhibitor-Removal Beads | Used to test if inhibition originates from the sample or is introduced by kit components (e.g., buffer carryover). |
| Dual-Lot Validation Sets | Purchasing two different lot numbers of the same kit simultaneously to conduct prospective, head-to-head performance validation before full adoption. |
Ensuring Data Fidelity: Validation Frameworks and Comparative Kit Analysis
Technical Support Center: Troubleshooting & FAQs
Q1: My DNA yield from a new kit lot is consistently 30% lower than the previous lot, despite using identical samples and protocols. What should I investigate?
A: This indicates a potential batch effect in lysis or binding efficiency. Follow this troubleshooting protocol:
- Cross-Lot Comparison: Process the same homogenized sample split across the old and new lots in triplicate.
- Spike-In Control: Use a standardized, exogenous DNA spike (e.g., lambda phage DNA) added to the lysis buffer. Measure its recovery via qPCR with specific primers.
- Check Binding Conditions: Verify the pH and composition of the binding buffer. Perform a step-by-step assessment:
- After lysis, take an aliquot and purify with a standard phenol-chloroform method. Compare yield to kit output.
- After binding, retain the flow-through. Re-extract it with fresh beads/silica membrane to assess unbound DNA.
Q2: I suspect my DNA purity (A260/A280) issues are due to residual guanidinium salts in a specific kit lot. How can I confirm and resolve this?
A: Residual chaotropic salts can elevate A260/A280 ratios. To diagnose and fix:
- Confirmatory Test: Measure A230. High A230/A260 ratios indicate chaotropic salt contamination.
- Protocol Adjustment: Add an additional wash step with an 80% ethanol solution containing 20 mM NaCl. The salt helps displace guanidinium ions from the silica matrix.
- Post-Elution Cleanup: If the issue persists, use a post-elution cleanup column (e.g., Zymo DNA Clean & Concentrator) and compare pre- and post-cleanup purity metrics.
Q3: My downstream PCR fails with DNA from a new kit lot, but the DNA from the old lot works fine. Yield and purity metrics are similar. What's wrong?
A: This suggests the presence of enzymatic inhibitors co-purified from the new lot's reagents. Integrity (e.g., gel) may appear normal.
- Inhibitor Detection Test: Perform a standardized qPCR amplification efficiency test. Use a control plasmid and serially dilute it in both nuclease-free water and your eluted DNA sample. A significant shift in Ct values or efficiency indicates PCR inhibition.
- Protocol Mitigation: Increase the amount of DNA polymerase in your PCR mix by 25-50% or include a PCR enhancer like BSA (0.1 µg/µL) or T4 Gene 32 Protein (0.5 µM).
- Alternative Solution: Re-precipitate the DNA using glycogen and ethanol to remove soluble inhibitors.
Q4: How do I systematically validate genomic DNA integrity across multiple kit lots for long-range PCR or NGS?
A: Integrity is critical for long-fragment applications. Use a multi-assay approach:
- Automated Electrophoresis: Use a Fragment Analyzer or TapeStation to generate a DNA Integrity Number (DIN) or DV200 score. A rigorous lot validation study should show DIN scores with a standard deviation of <0.3 across lots for a standard sample.
- Long-Range PCR Test: Amplify a multi-kb target (e.g., 5kb, 10kb, 20kb) from a single-copy gene. Compare band intensity and specificity across DNA from different lots.
- Functional NGS Test: For NGS, prepare libraries using a standardized input (e.g., 100 ng) from each lot and compare:
- Library concentration post-adapter ligation
- Percentage of on-target reads
- Coverage uniformity
Experimental Protocols for Validation
Protocol 1: Comprehensive Multi-Lot Yield & Purity Assessment
Objective: Quantify yield, purity, and consistency across three kit lots (n=6 replicates per lot). Materials: Standardized reference tissue (e.g., rat liver, flash-frozen), three kit lots, spectrophotometer/fluorometer. Method:
- Homogenize 25 mg of reference tissue in 1 mL of recommended buffer. Split homogenate into 18 x 50 µL aliquots.
- Extract 6 aliquots per kit lot following the standard protocol.
- Elute all in 50 µL of elution buffer.
- Quantification: Measure yield via fluorometry (Qubit dsDNA HS Assay) for accuracy and spectrophotometry (NanoDrop) for A260/A280 and A260/A230 ratios.
- Data Analysis: Perform one-way ANOVA to compare mean yield and purity ratios across lots.
Protocol 2: qPCR-Based Inhibitor Detection & Functional Yield
Objective: Determine the presence of PCR inhibitors and the amplifiable DNA yield. Materials: DNA samples from Protocol 1, TaqMan qPCR assay for a single-copy gene (e.g., RNase P), exogenous DNA spike. Method:
- Spike Recovery: Add a known quantity of exogenous DNA (e.g., 10,000 copies of lambda DNA) to each eluted sample and a nuclease-free water control. Perform qPCR targeting the spike sequence. Calculate % recovery.
- Amplification Efficiency: Create a standard curve (e.g., 10-fold serial dilutions) of a control human genomic DNA in nuclease-free water. Run the same standard curve diluted in your sample elution buffer. A >10% drop in efficiency indicates inhibition.
- Functional Yield: Use the sample DNA to qPCR-amplify a single-copy endogenous target. Calculate the amplifiable DNA concentration using the standard curve. Compare to the fluorometric yield.
Table 1: Comparative Yield and Purity Metrics Across Three Kit Lots (Mean ± SD)
| Kit Lot ID | Fluorometric Yield (ng/µL) | Spectrophotometric Yield (ng/µL) | A260/A280 | A260/A230 | Amplifiable DNA by qPCR (ng/µL) |
|---|---|---|---|---|---|
| Lot A (Ref) | 45.2 ± 3.1 | 48.5 ± 5.2 | 1.88 ± 0.03 | 2.15 ± 0.10 | 42.1 ± 2.8 |
| Lot B | 31.5 ± 4.5* | 50.1 ± 6.8 | 1.92 ± 0.05 | 1.65 ± 0.15* | 28.9 ± 3.5* |
| Lot C | 44.8 ± 2.9 | 46.9 ± 4.1 | 1.81 ± 0.04* | 2.05 ± 0.12 | 41.5 ± 2.6 |
*Denotes a statistically significant difference (p < 0.05) from Lot A.
Table 2: Functional Performance and Integrity Assessment
| Kit Lot ID | DIN Score | 10kb LR-PCR Success Rate | NGS Library Prep Efficiency (%) | Spike-in Recovery in qPCR (%) |
|---|---|---|---|---|
| Lot A (Ref) | 8.2 ± 0.2 | 6/6 | 78 ± 5 | 98 ± 7 |
| Lot B | 8.0 ± 0.3 | 4/6 | 65 ± 8* | 45 ± 12* |
| Lot C | 8.1 ± 0.2 | 6/6 | 76 ± 6 | 102 ± 5 |
*Denotes a statistically significant difference (p < 0.05) from Lot A.
Visualizations
Diagram Title: Kit Lot Validation Study Core Workflow & Decision Tree
Diagram Title: Troubleshooting Batch Effects: Root Cause to Solution
The Scientist's Toolkit: Research Reagent Solutions
| Item | Function in Validation Study |
|---|---|
| Reference Standard Tissue | Provides a biologically consistent, homogeneous sample matrix for cross-lot comparisons. (e.g., Lyophilized Cell Pellet, Flash-Frozen Tissue). |
| Fluorometric DNA Assay (Qubit) | Provides accurate, dye-based quantification of double-stranded DNA, unaffected by common contaminants. |
| Exogenous DNA Spike (e.g., Lambda Phage) | Controls for extraction efficiency and detects PCR inhibitors when used in a qPCR recovery assay. |
| Automated Electrophoresis System | Quantifies DNA integrity and size distribution objectively (e.g., Agilent TapeStation, Fragment Analyzer). |
| Single-Copy Gene qPCR Assay | Measures the "amplifiable" or functional DNA yield, critical for downstream genotyping or sequencing. |
| PCR Inhibitor Test Kit | Specifically identifies and quantifies common inhibitors like humic acid, hematin, or tannins. |
| Post-Extraction Cleanup Columns | Enables remediation of purity or inhibitor issues from a problematic lot (e.g., Zymo DNA Clean columns). |
| Standardized NGS Library Prep Kit | Functional test to assess DNA performance in next-generation sequencing applications. |
Technical Support Center
Troubleshooting Guides & FAQs
Q1: My silica-column kit yields consistently low DNA concentrations. What are the likely causes and solutions? A: Low yield in silica kits is often due to incomplete lysis, ethanol carryover, or inadequate elution. Ensure tissue is fully homogenized and lysis incubation times are followed. Verify that wash buffers contain the correct ethanol concentration. For elution, pre-warm elution buffer to 55-60°C, let it sit on the membrane for 2-5 minutes before centrifugation, and consider a second elution step. Always elute in a low-EDTA TE buffer or nuclease-free water, not into the storage tube's cap.
Q2: Magnetic bead-based extractions show high variability in yield between samples in the same batch. How can I improve consistency? A: Bead variability often stems from inconsistent bead resuspension, bead aggregation, or inaccurate bead retrieval. Mitigation Protocol: 1) Vortex bead stock thoroughly before each use. 2) During binding, mix samples and beads by continuous gentle rotation or pipette mixing, not just vortexing. 3) Use a dedicated magnetic stand that positions tubes uniformly. Ensure the supernatant is clear before discarding. 4) Dry beads just until they appear matte (not cracked), as over-drying drastically reduces elution efficiency. 5) Use fresh, high-quality 80% ethanol for washes.
Q3: With liquid-liquid extraction (e.g., phenol-chloroform), I get poor DNA purity (260/230 < 1.8). What steps should I check? A: Low 260/230 indicates carbohydrate or organic solvent carryover. Troubleshooting Protocol: 1) After the aqueous phase transfer, perform a second chloroform-only extraction to remove residual phenol. 2) Ensure the final ethanol precipitation uses a 2.5x volume of 100% ethanol with 0.1 volume of 3M sodium acetate (pH 5.2). 3) Wash the pellet twice with freshly prepared 70% ethanol. 4) Allow the pellet to air-dry completely (10-15 minutes) with the tube inverted on a clean lint-free wipe to evaporate all ethanol. Do not speed-vac.
Q4: I suspect batch-to-batch variation in my commercial kit's binding buffer is affecting my results. How can I test and control for this? A: This is a core concern for batch effect mitigation research. Validation Protocol: 1) Aliquot a known "gold standard" batch of buffer and store at -20°C. 2) For each new batch, run a parallel extraction of a standardized reference sample (e.g., cultured cells, commercially available DNA standard) using the old and new batch buffers. 3) Quantify yield (Qubit) and purity (Nanodrop), and assess integrity (TapeStation/Fragment Analyzer). 4) Perform a downstream qPCR assay for a single-copy gene to assess PCR inhibition. 5) Document all lot numbers. Significant deviations (>20% yield difference, purity shifts, or altered Cq values) should be reported to the manufacturer.
Q5: How do I choose between kit types for challenging samples like FFPE tissue or blood? A: The choice is sample-dependent. For FFPE tissue, silica-column kits optimized for de-crosslinking are preferred. For whole blood, magnetic bead kits offer high throughput and automation compatibility. For serum/plasma cfDNA, specialized magnetic bead or silica-column kits designed for low-abundance targets are essential. For maximum purity and fragment size control from high-quality tissue, liquid-liquid extraction remains a gold standard, despite being more labor-intensive.
Table 1: Performance Metrics of Major DNA Extraction Methods
| Metric | Silica-Column Kit | Magnetic Bead Kit | Liquid-Liquid Extraction |
|---|---|---|---|
| Avg. Yield (µg from 1e6 cells) | 4.5 - 6.0 | 4.0 - 5.5 | 5.0 - 7.0 |
| Typical A260/280 Purity | 1.8 - 2.0 | 1.8 - 2.0 | 1.8 - 2.0 |
| Typical A260/230 Purity | 2.0 - 2.2 | 1.9 - 2.2 | 2.1 - 2.3 |
| Hands-on Time (minutes) | 30 - 45 | 20 - 30 | 60 - 90 |
| Ease of Automation | Moderate | High | Low |
| Cost per Sample (USD) | $3 - $8 | $4 - $10 | $1 - $3 (reagents only) |
| Risk of Batch Effects | Medium-High | Medium | Low |
| Optimal for Large Fragments | Moderate | Low-Moderate | High |
Table 2: Batch Effect Mitigation Strategies by Kit Type
| Kit Type | Primary Batch Risk Source | Recommended Mitigation Protocol |
|---|---|---|
| Silica-Column | Binding/Wash Buffer composition, membrane quality | 1) Bulk-test new lots against reference. 2) Use internal spike-in controls. 3) Standardize elution volume/temperature. |
| Magnetic Bead | Bead size/distribution, polymer coating, magnetic strength | 1) Qualify beads using size analyzer. 2) Standardize mixing/incubation times. 3) Use calibrated magnetic stands. |
| Liquid-Liquid | Organic solvent purity, pH of aqueous solutions | 1) Source reagents from single, high-purity lot. 2) Prepare all buffers fresh weekly. 3) Standardize phase separation time/force. |
Experimental Protocols
Protocol 1: Cross-Kit Batch Effect Assessment Objective: To quantitatively compare yield, purity, and functionality of DNA extracted from a reference cell line using three different kit lots.
- Sample Preparation: Cultivate HEK293 cells to 80% confluency. Trypsinize, count, and aliquot 1x10^6 cells per 1.5 mL microcentrifuge tube (n=9 per kit lot).
- Lysis: Process triplicate aliquots according to the manufacturer's instructions for each kit (Silica-column Kit Lot A, B, C; Magnetic Bead Kit Lot X, Y, Z).
- Elution: Elute all samples in 100 µL of pre-warmed (55°C) Elution Buffer (10 mM Tris-HCl, pH 8.5).
- Quantification: Measure DNA concentration using a fluorometer (Qubit dsDNA HS Assay). Assess purity via spectrophotometer (Nanodrop, record A260/280 and A260/230).
- Functional QC: Perform real-time qPCR for a 100bp and a 500bp amplicon of the GAPDH gene. Calculate ∆Cq (500bp - 100bp) as an indicator of fragmentation.
- Analysis: Perform one-way ANOVA on yield, purity ratios, and ∆Cq values across lots within each kit type.
Protocol 2: Mitigation via Internal Standard Spike-in Objective: To control for batch-derived inhibition or yield loss using a non-competing internal standard.
- Spike-in Addition: Prior to lysis, add a known quantity (e.g., 1000 copies) of a linearized plasmid containing a unique, non-homologous DNA sequence (e.g., from Arabidopsis thaliana) to each sample.
- Extraction: Proceed with standard extraction protocol for the kit being tested.
- Post-Extraction Quantification: Quantify total human DNA by Qubit. Quantify spike-in recovery via a separate, specific qPCR assay targeting the plasmid sequence.
- Normalization: Calculate a recovery correction factor (Expected copies / Recovered copies). Apply this factor to the total yield measurement to generate a batch-corrected yield estimate.
Visualizations
Title: Silica-Column DNA Extraction Workflow
Title: Troubleshooting Low Yield Across Kit Types
The Scientist's Toolkit: Research Reagent Solutions
| Item | Function in Batch Effect Mitigation |
|---|---|
| Standardized Reference Material (e.g., CRM 2373) | Provides a biologically consistent sample to compare extraction efficiency across different kit lots. |
| Non-Homologous Spike-in DNA (e.g., A. thaliana plasmid) | Internal control to quantify and correct for sample-specific losses or inhibition introduced during extraction. |
| Fluorometric DNA Quantification Kit (Qubit) | Provides accurate, dye-based quantitation unaffected by common contaminants that skew spectrophotometry. |
| Fragment Analyzer / Tapestation | Assesses DNA integrity and size profile, critical for detecting batch-related nuclease contamination or shear. |
| Calibrated Magnetic Stand | Ensures consistent bead retrieval across wells and plates in magnetic bead protocols, reducing positional bias. |
| Single-Lot, Molecular Grade Reagents (Ethanol, Isopropanol) | Eliminates variability introduced by differing grades or impurities in bulk precipitation/wash reagents. |
| Digital pH Meter | Verifies the pH of all manually prepared solutions (e.g., Tris-EDTA, elution buffers), a key factor in DNA stability and elution. |
Technical Support Center
Troubleshooting Guides & FAQs
Q1: My ComBat-corrected data still shows batch clustering in the PCA. What went wrong?
A: This often indicates incomplete correction due to model misspecification. Ensure your model matrix (mod) correctly includes all known biological covariates of interest (e.g., disease status). Do not include the batch variable in mod. Verify you are using the parametric option for small sample sizes (<20 batches) and the non-parametric option for larger studies. Check for severe batch-biased distributions before correction; extreme bias may require prior data transformation.
Q2: When using SVA, how do I determine the number of surrogate variables (n.sv)?
A: The num.sv() function from the sva package estimates the number. Use the be method (based on Leek's asymptotic approach) for large sample sizes. For smaller studies (<50 samples), use the permutation-based method (method="be" is default). Over-estimation is safer than under-estimation. Cross-check by running sva with n.sv set from 1 to 5 and observing the reduction in batch association in the residuals.
Q3: RUV requires negative control genes. What if I don't have a reliable set?
A: Three practical alternatives exist: 1) Use in silico empirical controls (e.g., genes with the smallest coefficient of variation across samples via RUVr). 2) Use replicate samples analyzed across batches as positive controls for RUVs. 3) Use a housekeeping gene list from literature, but validate their stability in your dataset first using the NormqPCR package. Performance varies; RUVs with replicates is often most robust.
Q4: After batch correction, my differential expression results are null. Is this expected?
A: Possibly. Over-correction can remove biological signal. Diagnose by: 1) Comparing PCA plots before/after correction—biological groups should remain distinct while batch clusters merge. 2) Running a negative control: Perform DE analysis on a positive control gene pair known not to be affected by your condition. 3) Reducing the aggressiveness of correction: For ComBat, try mean.only=TRUE. For RUV, decrease the number of factors (k).
Q5: How do I handle a confounded design where batch and condition are perfectly correlated?
A: This is a severe limitation. Statistical correction cannot fully resolve this. Mitigation strategies include: 1) SVA: Can estimate surrogate variables that are not confounded with the primary variable. 2) ComBat with prior information: Use the prior.plots=TRUE option to visualize shrinkage. 3) RUVg with spike-in controls. Best Practice: Always design experiments to avoid this by processing samples from each condition in every batch.
Data Presentation: Method Comparison
Table 1: Comparison of Core Batch Effect Correction Methods
| Feature | ComBat (sva package) | SVA (surrogate variable analysis) | RUV (Remove Unwanted Variation) |
|---|---|---|---|
| Core Principle | Empirical Bayes shrinkage of batch means/variances. | Estimates and removes latent surrogate variables. | Uses control genes/samples to estimate unwanted variation. |
| Key Assumption | Batch effects are systematic and additive/multiplicative. | Batch effects are captured by latent factors orthogonal to biology. | Control features are only affected by batch, not biology. |
| Required Input | Batch vector, optional model matrix for covariates. | Expression matrix, model matrix for variables of interest. | Expression matrix + control genes (RUVg), replicates (RUVs), or residuals (RUVr). |
| Best For | Known, discrete batches. | Unknown or complex batch sources. | Studies with reliable negative controls or replicates. |
| Typical Runtime (for 20k genes x 100 samples) | ~5 seconds | ~30-60 seconds | ~10-45 seconds |
| Risk of Over-correction | Moderate (controlled by empirical Bayes). | Low to Moderate (depends on n.sv). | High if controls are poorly chosen. |
Experimental Protocols
Protocol 1: Validating Batch Effect Correction in a DNA Extraction Kit Study
- Experimental Design: Extract DNA from 40 samples (20 Case, 20 Control) using two different kit batches (Batch A & B), balancing condition across batches.
- Data Generation: Process samples via microarray or RNA-seq. Quantify expression.
- Pre-Correction Diagnostics: Generate PCA plot colored by
Batchand byCondition. Calculate Average Silhouette Width for batch clusters. - Apply Correction: Run ComBat:
corrected_data <- ComBat(dat=expression_matrix, batch=batch_vector, mod=model.matrix(~condition)). - Post-Correction Validation:
- PCA plot on corrected data.
- Compute Percent Variance Explained by batch vs. condition before/after (see Table 2).
- Perform differential expression (DE) analysis (e.g., limma) on raw and corrected data. Compare the number of significant DE genes (FDR < 0.05) and the concordance of top hits.
Protocol 2: Implementing RUVs with Technical Replicates
- Replicate Design: Include at least 2 sample replicates (from the same biological source) processed in different batch runs.
- Create Replicate Matrix: Use
makeReplicateExperimentfunction or manually create a matrix where columns are samples and rows are replicate sets. - Run RUVs:
fit <- RUVs(expression_matrix, cIdx=row_controls, k=1, scIdx=replicate_matrix).cIdx: Index of control genes (e.g., housekeeping or least variable genes).k: Number of unwanted factors to remove (start with 1).
- Incorporate into DE: Use the adjusted counts
fit$normalizedCountsor include the estimated factorsfit$Was covariates in your DE model (~ W_1 + condition).
Mandatory Visualizations
Batch Effect Correction Decision Workflow
DNA Extraction Kit Batch Effect Study Design
The Scientist's Toolkit
Table 2: Essential Research Reagent Solutions for Batch Effect Studies
| Item | Function & Relevance to Batch Studies |
|---|---|
| Commercial Reference RNA (e.g., Universal Human Reference RNA) | Serves as a positive inter-batch control. Processed in every batch to monitor technical variability and assess correction efficacy. |
| External RNA Controls Consortium (ERCC) Spike-In Mix | Known concentration artificial RNAs. Added pre-extraction to differentiate technical (batch) from biological variation; crucial for RUVg. |
| RNase/DNase-Free Water (from single lot) | Consistent, high-purity water from a single manufacturing lot prevents introduction of chemical contaminants that vary between batches. |
| Validated Housekeeping Gene Panel | A pre-tested set of genes stable across conditions in your system. Used as negative controls for RUV or normalization validation. |
| Single-Lot Master Mix Kits | Performing a large study with all reagents (e.g., RT-PCR master mix) from a single manufacturing lot eliminates a major source of batch variation. |
| Inter-Batch Pooled Sample | An aliquot of a large, homogeneous pooled sample included in every batch run. Enables direct measurement of batch-induced variance. |
Introduction In research focused on mitigating DNA extraction kit batch effects, validation of new protocols and reagents requires an immutable benchmark. Phenol-chloroform extraction remains the historical "gold standard" for high-purity, high-molecular-weight DNA isolation. This technical support center provides guidance for using this method effectively as a validation control within batch effect studies, addressing common experimental pitfalls.
Troubleshooting Guides & FAQs
Q1: During phenol-chloroform extraction for my batch-effect validation study, I get low DNA yield. What are the primary causes? A: Low yield typically stems from incomplete precipitation or inefficient phase separation.
- Check pH: Ensure the aqueous phase pH is ~7.8-8.0. Acidic pH partitions DNA into the organic interface.
- Precipitation Protocol: Use 0.1 volumes of 3M sodium acetate (pH 5.2) and 2-2.5 volumes of 100% ethanol. Pre-chill ethanol at -20°C. Incubate at -20°C for >1 hour, preferably overnight.
- Centrifugation: Pellet at >12,000 x g for 30 minutes at 4°C. Carefully remove supernatant without disturbing the pellet.
- Wash Thoroughly: Wash with 70% ethanol (room temp) to remove salts, then centrifuge again for 10-15 minutes. Air-dry pellet completely (5-10 mins) before resuspension.
Q2: My phenol-chloroform extracted DNA has a poor A260/A280 ratio (<1.7), indicating protein contamination, which confounds my kit benchmarking. How do I resolve this? A: Residual phenol or protein contamination is likely.
- Repeat Extraction: Perform an additional chloroform:isoamyl alcohol (24:1) step only. Mix thoroughly, centrifuge, and transfer the upper aqueous phase carefully without disturbing the interface.
- Purification Post-Extraction: Use a commercial silica-column based clean-up kit after the initial precipitation. This effectively removes co-precipitated salts and organics, providing a pure benchmark for kit comparison.
- Avoid Over-drying: Do not over-dry the ethanol-washed pellet, as this makes DNA hydrophobic and difficult to resuspend, trapping contaminants.
Q3: The DNA I extracted via phenol-chloroform is sheared or degraded, making it a poor benchmark for kit performance on high-integrity DNA. What went wrong? A: Degradation is often due to physical shearing or nuclease activity.
- Gentle Handling: After adding chloroform and during resuspension, avoid vigorous vortexing or pipette mixing. Use a slow rocking motion or gentle inversion for mixing.
- Nuclease Inhibition: Ensure all solutions contain EDTA (e.g., TE buffer for resuspension). Use fresh, nuclease-free tubes and tips. Keep samples on ice when possible.
- Minimize Freeze-Thaw: Aliquot the final DNA product to avoid repeated freeze-thaw cycles.
Q4: How do I systematically compare my commercial kit results to the phenol-chloroform benchmark to identify batch effects? A: Establish a standardized validation panel. Run the following in parallel across test kits and multiple kit batches:
- Reference Sample: A single, large-volume biological sample aliquot (e.g., cell pellet) to be split for all extractions.
- Metrics Table: Measure and compare the quantitative and qualitative metrics below.
Table 1: Benchmarking Metrics for Batch Effect Analysis
| Metric | Phenol-Chloroform (Gold Standard) | Commercial Kit (Batch A) | Commercial Kit (Batch B) | Measurement Tool |
|---|---|---|---|---|
| Yield (ng/µL) | e.g., 125.4 ± 10.2 | e.g., 110.5 ± 15.7 | e.g., 98.3 ± 22.1 | Fluorometry (Qubit) |
| Purity (A260/A280) | 1.80 ± 0.05 | 1.85 ± 0.10 | 1.72 ± 0.15* | Spectrophotometry |
| Integrity (DV200) | >85% | >80% | >75% | Fragment Analyzer/TapeStation |
| PCR Success Rate | 100% (Baseline) | 95% | 85%* | Amplification of long amplicons |
| Next-Gen Seq Metrics | (Baseline Map% / Dups) | Compare to Baseline | Compare to Baseline | Sequencing run QC |
*Potential indicator of a batch-specific issue.
Experimental Protocol: Phenol-Chloroform Extraction for Validation Studies
Title: High-Quality Genomic DNA Extraction for Benchmarking.
Materials:
- Lysis Buffer (10 mM Tris-HCl pH 8.0, 100 mM EDTA pH 8.0, 0.5% SDS)
- RNase A (20 mg/mL)
- Proteinase K (20 mg/mL)
- Phenol:Chloroform:Isoamyl Alcohol (25:24:1, pH 7.8-8.0)
- Chloroform:Isoamyl Alcohol (24:1)
- 3M Sodium Acetate (pH 5.2)
- 100% and 70% Ethanol (Molecular Biology Grade)
- TE Buffer (10 mM Tris-HCl, 1 mM EDTA, pH 8.0)
Procedure:
- Lysis: Resuspend cell pellet (~5x10^6 cells) in 500 µL Lysis Buffer. Add 5 µL RNase A, mix, incubate 37°C for 30 min.
- Digestion: Add 25 µL Proteinase K, mix thoroughly. Incubate at 56°C overnight (or ≥4 hours) with gentle agitation.
- Phenol Extraction: Cool to room temp. Add an equal volume (525 µL) of Phenol:Chloroform:Isoamyl Alcohol. Mix by gentle inversion for 10 minutes. Centrifuge at 12,000 x g for 15 minutes at 4°C.
- Phase Transfer: Carefully transfer the upper aqueous phase to a new tube. Avoid the white protein interface.
- Chloroform Extraction: Add an equal volume of Chloroform:Isoamyl Alcohol (24:1). Mix by inversion for 5 minutes. Centrifuge at 12,000 x g for 10 minutes at 4°C. Transfer aqueous phase to a new tube.
- Precipitation: Add 0.1 volumes of 3M Sodium Acetate and 2.5 volumes of ice-cold 100% Ethanol. Mix by gentle inversion. Precipitate at -20°C overnight.
- Pellet & Wash: Centrifuge at 12,000 x g for 30 minutes at 4°C. Decant supernatant. Wash pellet with 1 mL of 70% ethanol. Centrifuge at 12,000 x g for 15 minutes. Carefully aspirate ethanol.
- Resuspension: Air-dry pellet for 5-10 minutes. Resuspend in 50-100 µL TE Buffer. Gently heat at 55°C for 1 hour to aid dissolution. Quantify and assess quality.
The Scientist's Toolkit: Research Reagent Solutions
| Item | Function in Validation Protocol |
|---|---|
| Phenol:Chloroform:Isoamyl (pH 8) | Denatures and removes proteins, lipids. Isoamyl alcohol reduces foaming. |
| Proteinase K | Broad-spectrum serine protease; digests nucleases and other proteins. |
| RNase A | Degrades RNA to prevent co-precipitation and inaccurate nucleic acid quantification. |
| 3M Sodium Acetate (pH 5.2) | Provides monovalent cations (Na+) to neutralize DNA charge, enabling ethanol precipitation. |
| Glycogen (20 mg/mL) | Optional carrier to visualize and improve recovery of low-concentration DNA pellets. |
| Phase Lock Gel Tubes | Alternative to manual phase separation; creates a barrier to prevent interface transfer. |
Workflow Diagram: Benchmarking Strategy for Kit Batch Validation
Title: DNA Extraction Kit Batch Effect Validation Workflow
Diagram: Problem-Shooting Logic for Poor Purity (Low A260/A280)
Title: Troubleshooting Guide for DNA Purity Issues
FAQs & Troubleshooting
Q1: Why is documenting the specific lot number of a DNA extraction kit critical for reproducibility in my publication, beyond just citing the kit name? A1: Lot-to-lot variability in reagent composition, membrane batch quality, or enzyme activity can introduce significant technical noise or batch effects. Documenting the lot number allows reviewers and other researchers to trace discrepancies, correlate findings with manufacturer quality reports, or identify if an outlier result is linked to a specific reagent batch. In batch effect mitigation research, this is the first essential step for diagnosing non-biological variation.
Q2: I can't find the lot number on the kit box or tube. Where should I look? A2: Check the following locations:
- Side of the main kit cardboard box.
- Label on each individual plastic bottle or tube containing buffers, enzymes, or columns.
- Product insert or manual that came in the box.
- The manufacturer's product webpage under "specifications" or "support," if you registered the kit online.
Q3: My experiment failed, and I suspect a faulty kit batch. What steps should I take before repeating the experiment? A3: Follow this systematic troubleshooting guide:
- Document Everything: Record the lot numbers for all reagents used.
- Positive Control Test: Run the kit's included positive control (if any) or a known, high-quality sample.
- Inter-Kit Comparison: Repeat the extraction on the same failed sample using a different kit from a different lot number.
- Check for Alerts: Search the manufacturer's website for technical service bulletins or lot-specific alerts.
- Contact Support: Report the issue to the manufacturer's technical support with all lot numbers, your protocol, and QC data (e.g., Bioanalyzer/Fragment Analyzer traces).
Q4: What kit information, exactly, must be reported in the 'Materials and Methods' section of a paper? A4: The minimum required information is summarized in the table below.
Table 1: Minimum Reporting Standards for DNA Extraction Kits in Publications
| Data Field | Example Entry | Reason for Inclusion |
|---|---|---|
| Kit Name | DNeasy Blood & Tissue Kit | Identifies core protocol. |
| Manufacturer | Qiagen | Identifies supplier. |
| Catalog Number | 69504 | Specifies exact product. |
| Lot Numbers | Buffer ATL: 12345; Proteinase K: 67890; Columns: 13579 | Critical for traceability and batch effect analysis. |
| Location of Use | Laboratory B, Hood 3 | For institutional tracking. |
Q5: How do I handle reporting when I've used components from multiple kits or lots in a single experiment? A5: This must be explicitly detailed. Create a table listing each reagent (e.g., Lysis Buffer, Wash Buffer, Elution Buffer, Silica Columns) and the corresponding lot number and source kit used. This granularity is essential for advanced batch effect modeling.
Experimental Protocol: Validating Kit Lot Consistency
This protocol is designed to assess performance variability between different lots of the same DNA extraction kit.
Objective: To quantify yield, purity, and fragment size distribution differences between two lot numbers of a specified DNA extraction kit.
Materials: See "The Scientist's Toolkit" below. Methods:
- Sample Preparation: Aliquot a single, large-volume, homogeneous biological sample (e.g., cell culture pellet, tissue homogenate) into 12 identical tubes (n=6 per kit lot).
- Extraction: Perform DNA extraction simultaneously using identical equipment and a calibrated pipette set. Process 6 samples with Kit Lot A and 6 with Kit Lot B in a randomized block design.
- Quantification & QC: Elute all samples in an identical volume. Measure DNA concentration (e.g., Qubit dsDNA HS Assay) and purity (A260/A280, A260/A230) for each eluate.
- Integrity Analysis: Run all samples on a Fragment Analyzer or Bioanalyzer (Genomic DNA assay) to generate a DV200 or DIN score.
- Data Analysis: Perform a two-sample t-test (or non-parametric equivalent) on yield, purity, and integrity metrics between the two lot groups. A p-value <0.05 may indicate significant lot-based variation.
Visualization of Workflow:
Title: Experimental Workflow for Kit Lot Validation
The Scientist's Toolkit
Table 2: Essential Reagents and Materials for Kit Lot Validation Studies
| Item | Function / Rationale |
|---|---|
| Homogeneous Biological Sample Pool | A single, well-mixed source material (e.g., >10^7 cells) to eliminate biological variance. |
| Dual-Lot DNA Extraction Kits | The test articles. Must be the same catalog number but different lot numbers. |
| Fluorometric DNA Quantification Assay (e.g., Qubit) | Provides specific, dye-based DNA concentration, superior to UV absorbance for purity. |
| Microvolume Spectrophotometer (e.g., NanoDrop) | Provides rapid A260/A280 and A260/230 ratios for purity assessment. |
| Automated Electrophoresis System (e.g., Fragment Analyzer, Bioanalyzer) | Gold standard for assessing DNA integrity/size distribution (DV200, DIN). |
| Low-Bind Microcentrifuge Tubes & Tips | Minimizes DNA adsorption to plastics, improving accuracy of low-yield eluates. |
| Calibrated Pipettes | Essential for precision in volume handling during split-sample experiments. |
Conclusion
Mitigating DNA extraction kit batch effects is not a peripheral concern but a fundamental requirement for rigorous genomic science. A proactive, multi-faceted approach—combining robust experimental design, meticulous lot tracking, systematic troubleshooting, and rigorous statistical validation—is essential to safeguard data integrity. As research moves towards larger multi-omics cohorts and clinically actionable biomarkers, the consistent application of these mitigation strategies will be paramount. Future directions include the development of universal extraction standards, improved manufacturer transparency regarding lot-specific QC, and advanced AI-driven batch correction algorithms. Ultimately, mastering batch effect mitigation transforms a potential source of error into a hallmark of methodological excellence, ensuring that biological signal, not technical artifact, drives discovery in drug development and clinical research.